BigQuery collaboration guide
Revision: 3.0.0-13982-8553d754
1 Introduction
1.1 Organization of this document
This document describes how to integrate GridDB Cloud with Google Cloud's BigQuery. The following is a summary of each chapter.
Google Cloud and BigQuery are the services provided by Google Inc.
Introduction
Chapter 1 describes the organization of this document and terminology.About BigQuery
Chapter 2 explains BigQuery.Procedure for integrating GridDB Cloud with BigQuery
Chapter 3 provides an example showing how to transfer a CSV file that is output by GridDB Cloud to Google Cloud and load it as BigQuery data.Data type mapping between GridDB Cloud and BigQuery
Chapter 4 presents a table that maps the data type in GridDB Cloud to the corresponding data type in BigQuery.
1.2 Terminology
The following are the terms and their descriptions used in this document.
| Term | Description |
|---|---|
| Google Cloud | This is a cloud service provided by Google Inc. For details, see (cloud.google.com). |
| BigQuery | This is a Google Cloud service that enables users to build a data warehouse and analyze data. |
| Data Transfer | This is a Google Cloud service that enables users to transfer data from an external data source. |
| Cloud Storage | This is a Google Cloud service that enables users to store and accumulate data. |
| Azure Blob Storage | This is a Microsoft cloud service called an Azure service that enables users to store and accumulate data. |
2 About BigQuery
BigQuery is a Google Cloud service provided by Google.
It is a service that builds a data warehouse from a specified data source and analyzes data.
For details, see (cloud.google.com/bigquery).
3 Procedure for interacting GridDB Cloud with BigQuery
Chapter 3 describes the procedure for integrating GridDB Cloud with BigQuery.
This procedure uses regular export in GridDB Cloud and Azure Blob Storage in Microsoft Azure as well as Data Transfer, Cloud Storage, and BigQuery in Google Cloud.

Regular export for GridDB Cloud is a function to output data that is accumulated in GridDB Cloud to Azure Blob Storage.
For details about regular export, see (Regular Export Schedules Function) and (Regular Export Job Function) in the "Management GUI Reference for GridDB Cloud."
By using regular export for GridDB Cloud, a csv file is output which follows the file naming conventions below:
- [GridDB database name.container name_yyyyMMddHH_id.csv]
Integration is achieved by transferring the output file to Google Cloud Storage using Google's Cloud Storage Transfer Service and then loading it as Big Query table data from Cloud Storage. There are two modes of integration with BigQuery: one is to export manually or on an irregular basis when needed and the other is to export regularly, including on an hourly, daily, or weekly basis, each of which is described below:
■To integrate GridDB Cloud with BigQuery manually or on an irregular basis
3.1 Regular export from GridDB Cloud
3.2 Steps to transfer a file exported from GridDB Cloud
3.3 Steps to create a table in BigQuery based on files in Google Cloud Storage
3.4 Steps to append data to a BigQuery table
■To regularly integrate GridDB with BigQuery
3.1 Regular export from GridDB Cloud
3.2 Steps to transfer a file exported from GridDB Cloud
3.3 Steps to create a table in BigQuery based on files in Google Cloud Storage
3.5 Steps to append regular data to a BigQuery table
3.1 Regular export from GridDB Cloud
GridDB Cloud features a regular export function that enables users to export GridDB data at a specified interval (as illustrated by ① in the following figure showing the procedure for integrating GridDB Cloud with BigQuery).

For details on steps to perform regular export, see (Regular Export Schedules Function) and (Regular Export Job Function) in the "Management GUI Reference for GridDB Cloud" and follow the steps to perform regular export.
Once the steps to perform regular export are completed, for future reference, note the following information in the dialog shown in Step 4 in "4.15.11. Storage access information" in the "Management GUI Reference for GridDB Cloud" (Storage access information/Step 4).
- [Storage Account]
- [Container Name]
- [SAS]
3.2 Steps to transfer a file exported from GridDB Cloud
This section describes steps to transfer a file exported using regular export for GridDB Cloud and stored in Azure Blob Storage to Google Cloud Storage (as illustrated by ② in the following figure showing the procedure for integrating GridDB Cloud with BigQuery).

- Create the destination bucket in Google Cloud Storage. In the Google Cloud console, select "Cloud Storage" and display the Cloud Storage list screen.
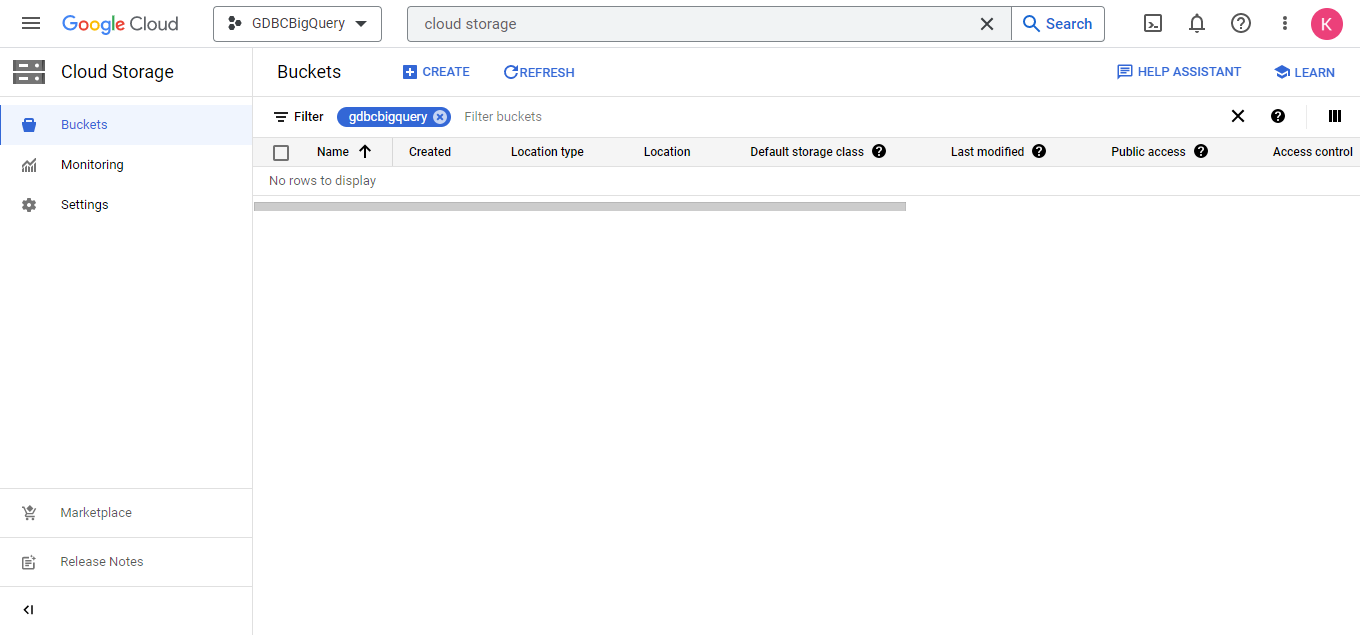
In the Cloud Storage list screen, click the CREATE button to display a window to create a bucket.
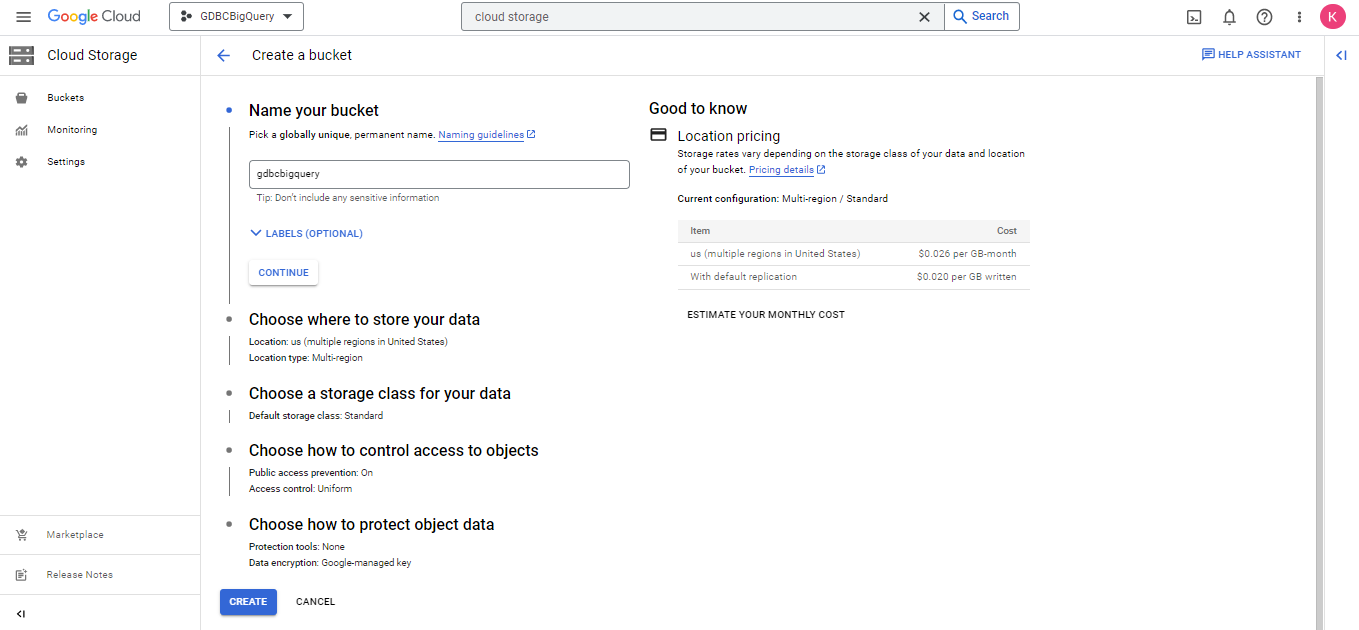
Specify a bucket name, where to store data, and other information and press the "CREATE" button to create a bucket.
- Transfer a file to Cloud Storage using Data Transfer in Google Cloud. In the Google Cloud console, select "Data Transfer" and display the transfer job list screen.
![]()
In the transfer job list screen, select the "CREATE JOB TRANSFER" button and display the Create a transfer job window.
Click "① Get started" in the Create a transfer job window and select "Azure Blob Storage or Data Lake Storage Gen2" for "Source type" and "Google Cloud Storage" for "Destination type", respectively. Then press the "NEXT STEP" button to proceed to the next step.
![]()
In "② Choose a source", specify each of the following:
"Storage account name"
Specify the [Storage Account] that was noted earlier in "Regular export from GridDB Cloud" as a Storage account name."Container or folder"
Specify the [Container Name] that was noted earlier in "Regular export from GridDB Cloud" as a container name."Shared access signature (SAS)"
Create a URL from the [Storage Account], [Container Name], and [SAS] that were noted earlier in "Regular export from GridDB Cloud" as follows:
https://[Storage Account].blob.core.windows.net/[Container Name]?[SAS]
Specify the URL just created as "BLOB SAS URL". As of December 2022, an input box is provided to enter SAS instead of BLOB SAS URL, but do not enter SAS itself; make sure to enter a URL constructed as above, which includes SAS.Filters (optional)
Press the "ADD PREFIX" button to select which files to include from data source. In our case, the output file is named "GridDB database name.container name_yyyyMMddHH_id.csv" after performing regular export in 3.1. This means if you enter "GridDB database name.container name_yyyyMMdd", for example, you can filter the file to be transferred. Enter a prefix according to your needs.
After completing the settings for each of the items above, press the "NEXT STEP" button to proceed to the next step.
![]()
For "③ Choose a destination", in the field "Bucket or folder," choose "BROWSE" and select the bucket created in the previous step "1. Create the destination bucket in Google Cloud Storage."
Once the destination is selected, press the "NEXT STEP" button to proceed to the next step.
![]()
For "④ Choose how and when to run job", specify the method to run a transfer job and its schedule.
"Run only once"
Runs only a single transfer job."Run every day"
Runs a transfer job daily."Run every week"
Runs a transfer job weekly."Run with custom frequency"
Runs a transfer at a frequency selected for "custom frequency". To repeat a transfer job at a regular interval, choose this option and specify the interval of Hours, Days, or Weeks.
After completing the settings, press the "NEXT STEP" button to proceed to the next step.
![]()
To customize your job, make the following settings under "⑤ Choose settings".
- When to delete
Select "Delete file from source after they're transferred".
For the rest of items, make the settings to suit your needs.
After completing the settings, press the "Create" button to create a transfer job.
![]()
You are sent back to the the transfer job list screen. The job created is added to the list.
Job transfer completes if the job created is successfully run according to the specified method and schedule.
![]()
3.3 Steps to create a table in BigQuery based on files in Google Cloud Storage
This section describes steps to create a table in BigQuery based on files in Google Cloud Storage (as illustrated by ③ in the following figure showing the procedure for integrating GridDB Cloud with BigQuery).

- Create a Big Query dataset in Google Cloud.
In the Google Cloud console, select "BigQuery" to display the BigQuery Explorer.
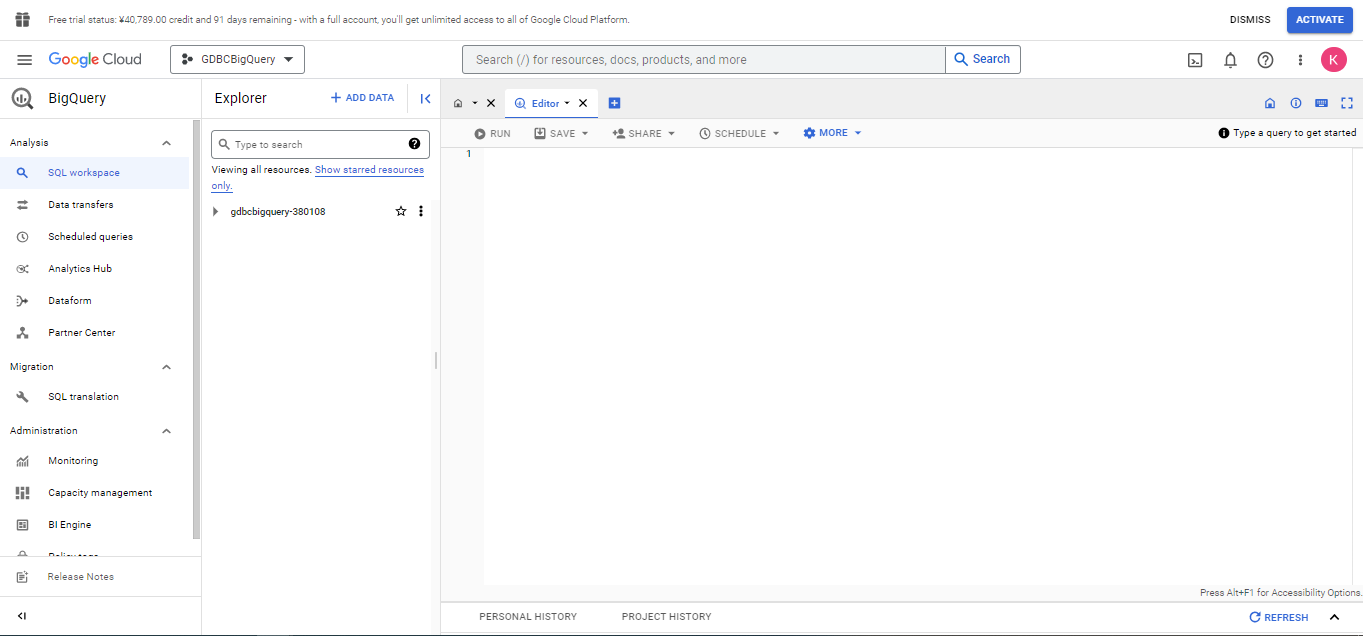
From the three vertical dots menu on the right of the Google Cloud project, select and click "Create dataset" to display the Create dataset screen.
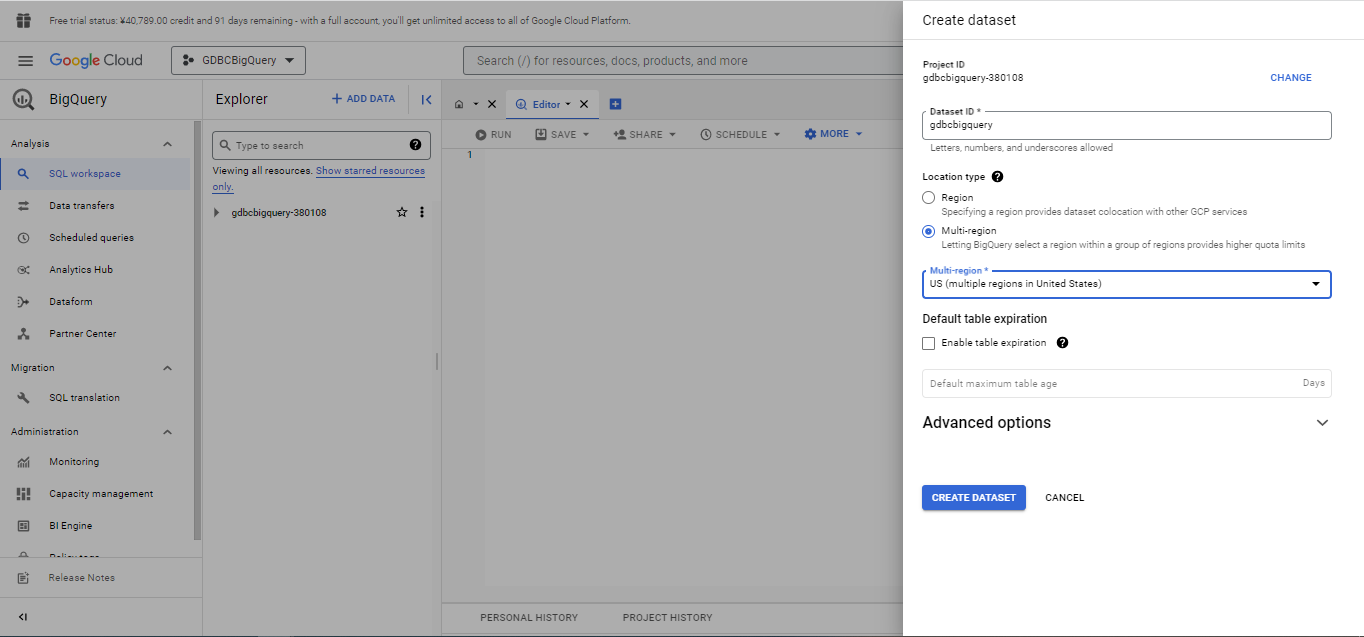
Specify the "Dataset ID" and "Location type" and press the "CREATE DATASET" button to create a dataset.
- Create a table from Cloud Storage using BigQuery in Google Cloud.
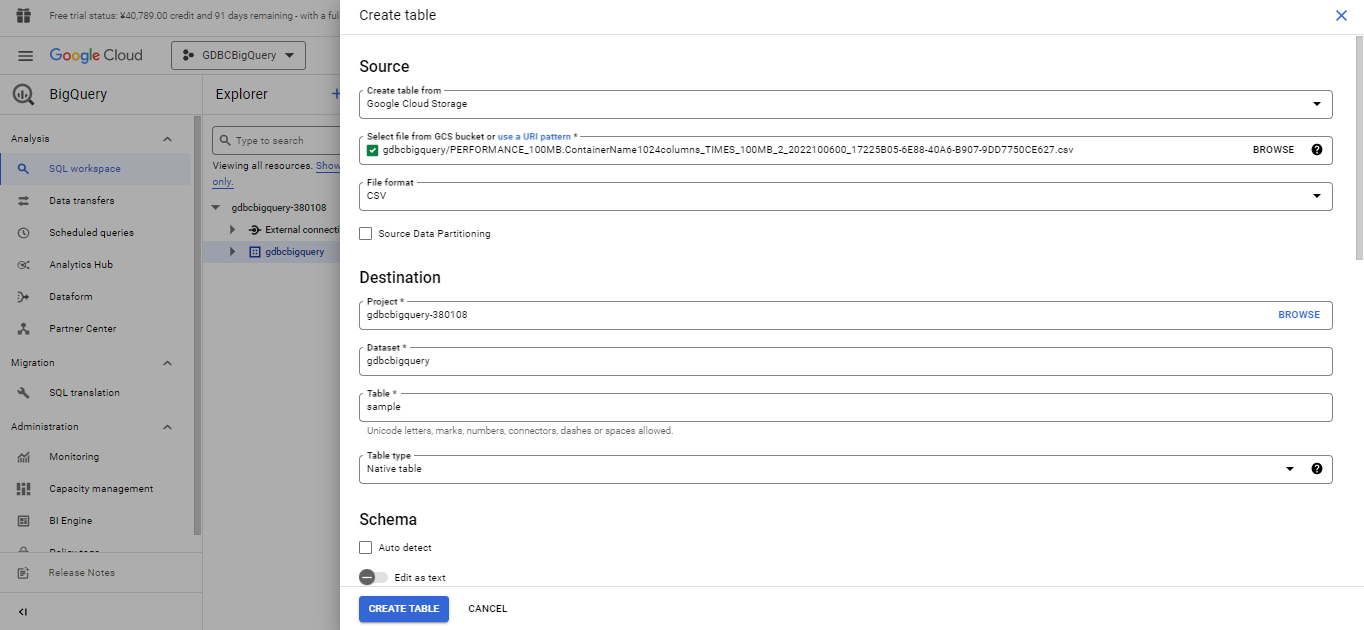
From the three vertical dots menu on the right of the dataset created, select and click "Create table" to display the Create table screen.
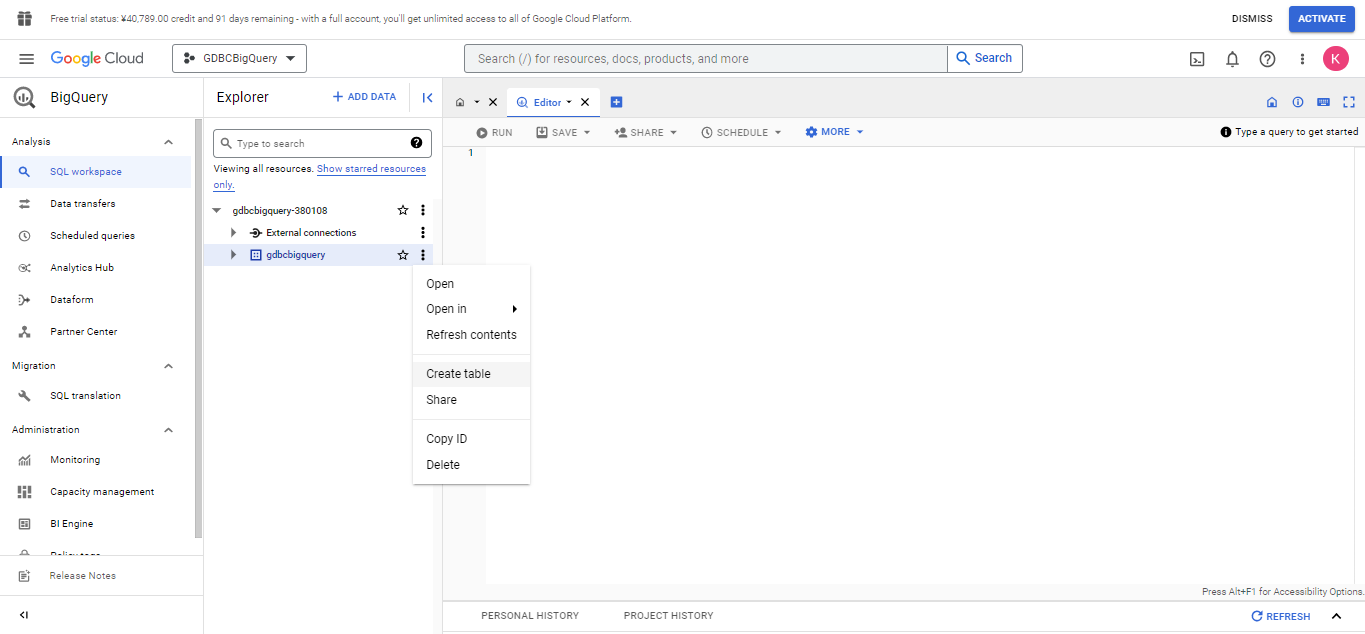
In the Create table screen, make the following settings:
Create table from
Select "Google Cloud Storage".Select file from GCS bucket or use a URI pattern
From the Google Cloud bucket, select the file transferred in the "Steps to transfer a file exported from GridDB Cloud".Table
Enter the name of a table to create.Schema
Do not check the checkbox for "auto detect" but click "+ ADD FIELD" to add a field instead. Set a "Field name (column name)", "Type (column type)", "Mode (NULLABLE)", and others. For details about the correspondence of column types between GridDB Cloud and BigQuery, see the "Data type mapping between GridDB Cloud and BigQuery".Advanced options
For "Header rows to skip", enter the number "4".
For other settings, enter values as needed. Upon completion of the settings, click the "CREATE TABLE" button to create a table.
If a table is successfully created, a message will be displayed to indicate a table has been successfully created.
This completes the creation of a BigQuery table.
3.4 Steps to append data to a BigQuery table
This section describes how to append data to a BigQuery table that has been created.
- Append data to a BigQuery table.
From the three vertical dots menu on the right of dataset created in "Steps to create a BigQuery table from Google Cloud Storage", select and click "Create table" to display the Create table screen.
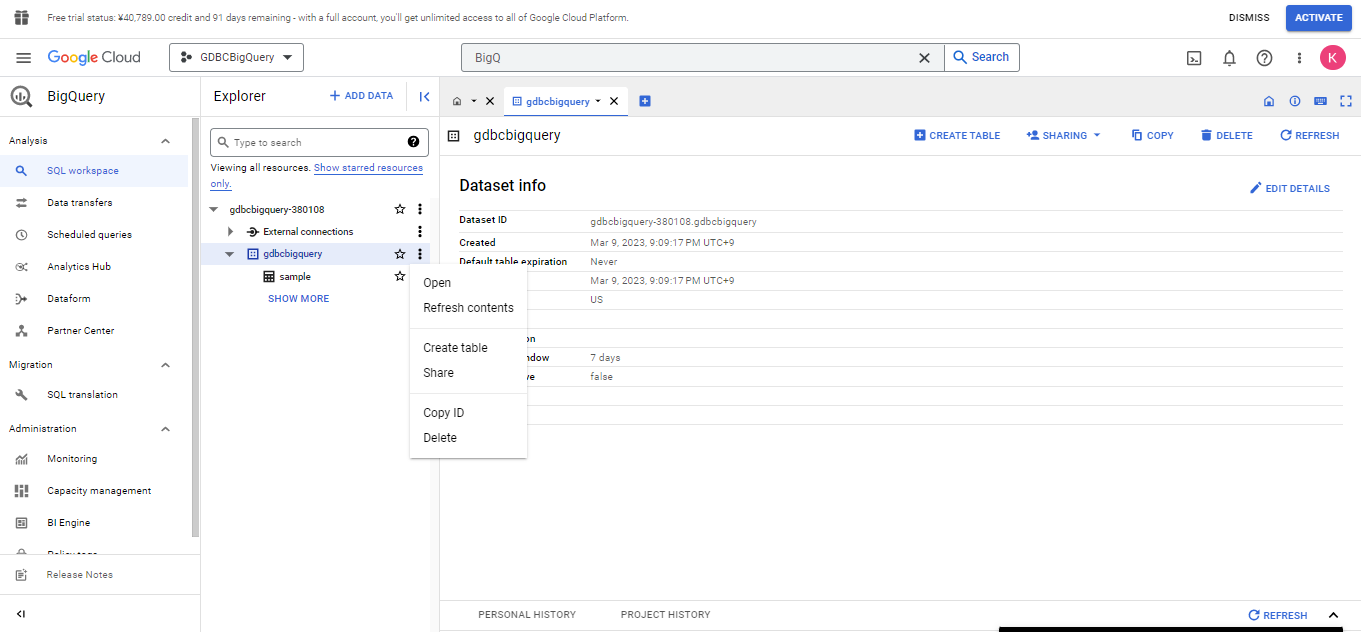
In the Create table screen, make the following settings:
Create table from
Select "Google Cloud Storage".Select file from GCS bucket or use a URI pattern
From the Google Cloud bucket, select a file that contains data to be added. Note that the data type and schema of the data to be added must be the same as those for the created table.Table
Enter the name of the created table.Schema
Check the checkbox for "Auto detect".
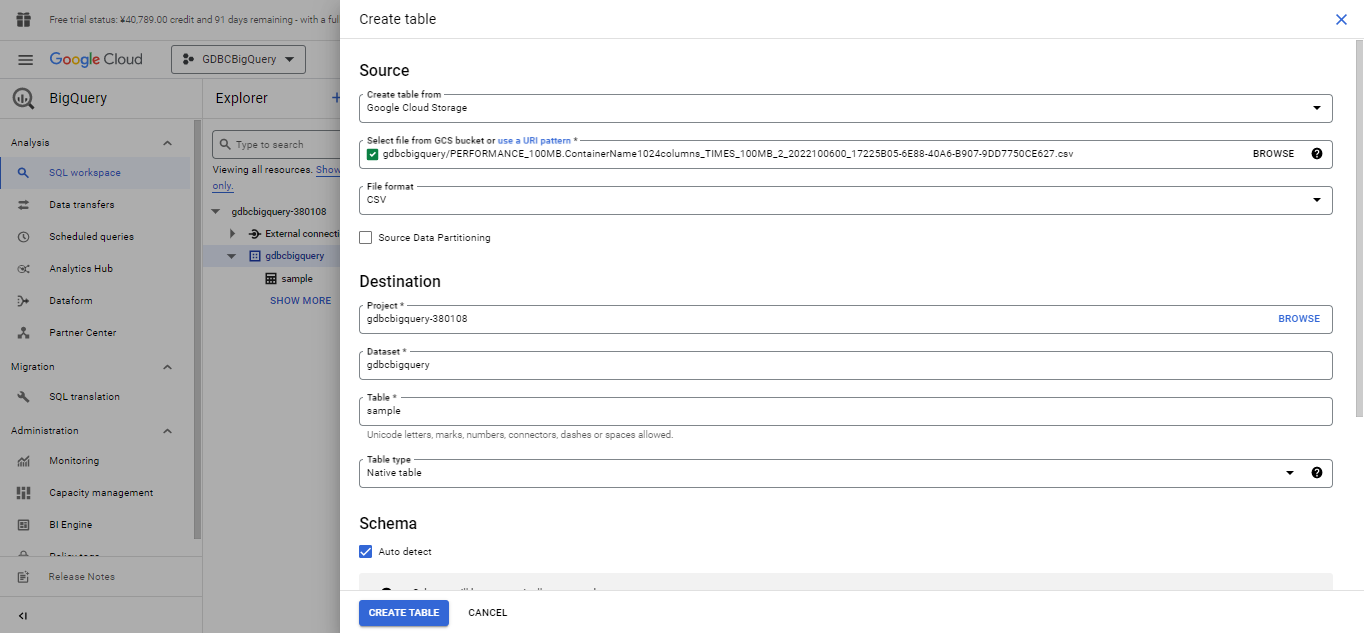
- Advanced options
For "Write preference", select "Append to table". To append a file that has been output using regular export in GridDB Cloud, enter the number "4" for "Header rows to skip".
For other settings, enter the values as needed. Upon completion of the settings, click the "CREATE TABLE" button to append data.

If data is successfully appended to a table, a message will be displayed to indicate a table has been successfully created.
This completes the appending of data to a BigQuery table.
3.5 Steps to append regular data to a BigQuery table
- Transfer a file exported from GridDB Cloud to Google Cloud Storage on a regular basis.
(Regular run of the action illustrated by ② in the following figure showing the procedure for integrating GridDB Cloud with BigQuery).
Refer to ④ Choose how and when to run job in Step 2 "Transfer a file to Cloud Storage using Data Transfer in Google Cloud." under the section "Steps to transfer a file exported from GridDB Cloud", specify the schedule to run a transfer job.
- Transfer file data from Cloud Storage to a BigQuery table on a regular basis.
(Regular run of the action illustrated by ③ in the following figure showing the procedure for integrating GridDB Cloud with BigQuery).
In the Google Cloud console, select "BigQuery" to display the BigQuery Explorer. From the left menu, select "Data transfers" under "Analysis" to display a list screen for Data Transfer Service.
![]()
Click the "CREATE A TRANSFER" button to create a transfer job.
Source type
Select "Google Cloud Storage".Transfer config name
Enter the name of a transfer job.Schedule options
In the Repeat frequency field, choose an option for how often to run the transfer according to your needs.Dataset
In the Destination settings section, for Dataset, specify the name of a dataset created in "Steps to create a BigQuery table from Google Cloud Storage".Destination table in the Data source details section
Specify the name of a table created in "Steps to create a BigQuery table from Google Cloud Storage".Cloud Storage URI in the Data source details section
Specify a bucket in Cloud Storage to be transferred."Delete source files after transfer"
Check the checkbox to delete the source files after each successful transfer. This is to avoid loading a file that has already been transferred again. If the checkbox is checked, transferred files will be deleted from Cloud Storage from which they were transferred.Header rows to skip
Enter the number 4 for "Header rows to skip"."Allow quoted newlines"
Check the checkbox for "Allow quoted newlines".
![]()
![]()
![]()
For other settings, enter values as needed.
Click the "SAVE" button to create a transfer job. If a transfer job is successfully created, the screen switches to another screen without showing any error message.
This completes the creation of a job to transfer data on a regular basis.
4 Data type mapping between GridDB Cloud and BigQuery
The following table shows Data type mapping between GridDB Cloud and BigQuery.
| GridDB data type | BigQuery data type |
|---|---|
| BOOL | BOOLEAN |
| STRING | STRING |
| BYTE | INTEGER |
| SHORT | INTEGER |
| INTEGER | INTEGER |
| LONG | INTEGER |
| FLOAT | FLOAT |
| DOUBLE | FLOAT |
| TIMESTAMP | TIMESTAMP |
Any other data types are not supported.
5 Limitations
The number of containers that can be processed in an hour is 100.
If the frequency of transfer is set to an hour in the steps for ④ Choose how and when to run job, the number of containers that can be processed in an hour will be equal to or less than 100.The total amount of data that can be transferred in a day is equal to or less than 1 GB.
While file transfer is repeated any number of times given the size of a file to be transferred is equal to or less than 1 GB in Steps to transfer a file exported from GridDB Cloud, the total amount of data that can be transferred in a day is equal to or less than 1 GB.

