User Guide for GridDB Telegraf Output Plugin
Revision: 2.1.0-12973-a96d5d04
1 Overview
The GridDB output plugin for Telegraf is a Telegraf output plugin to insert data into GridDB database using the HTTP/HTTPS method.
2 Installation
2.1 Requirements
Building of the plugin and execution have been tested in the following environment:
- Operation system: CentOS 7 or higher
- Go version 1.20 or higher
- NodeJS vs 18.16.0 or other LTS versions
- Telegraf version 1.26 release
- InfluxDB v2
- Web API version: GridDB version 5.3.0
2.2 Install Go
Refer to https://linuxize.com/post/how-to-install-go-on-centos-8/ or https://golang.org/doc/install to set up and install Go.
Alternatively, you can install Go on CentOS by using yum Refer to https://www.cyberithub.com/install-go-on-centos/ .:
$ yum install golang
Verify that you have installed Go by opening a command prompt and typing the following command:
$ go version
2.3 Install the GridDB output plugin for Telegraf
2.3.1 Build instructions
Step 1: Download the source code of the GridDB output plugin for Telegraf.
Step 2: Edit the parameter GO111MODULE by using the following two commands :
$ export GO111MODULE=auto
$ go env -w GO111MODULE=auto
Step 3: Change the working directory to the go folder and then download the telegraf source code by running the following command.
$ go get -d "github.com/influxdata/telegraf"
Step 4: Copy the source code of the GridDB output plugin for Telegraf to the telegraf root directory.
$ cp -R ./plugins ~/go/src/github.com/influxdata/telegraf
Step 5: Run the following commands to build Telegraf.
$ cd ~/go/src/github.com/influxdata/telegraf
$ make telegraf
2.3.2 Running Telegraf
The following example performs data transfer from InfluxDB v2 to GridDB:
Preparation:
The sample directory contains a telegraf configuration example file (
griddb.conf), and a javascript program file (parseInfluxDBResponse.js) to parse the InfluxDB v2 response. Need to install csv-parse v4.16.3 to parse InfluxDB CSV response:It will add
./node_modules/csv-parseto the current directory:sample/ ├── griddb.conf ├── parseInfluxDBResponse.js └── node_modules/ └── csv-parse/Copy the telegraf executable file from
~/go/src/github.com/influxdata/telegraf/telegrafto the./sampledirectory:The final directory structure will be the following:
sample/
├── telegraf
├── griddb.conf
├── parseInfluxDBResponse.js
└── node_modules/
    └── csv-parse/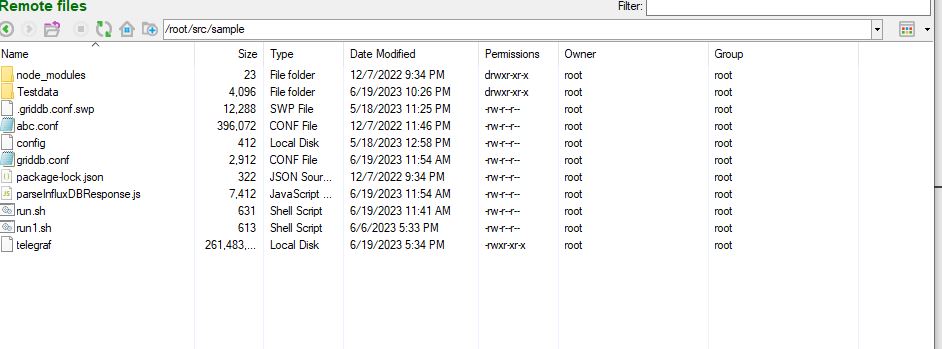
Folder "Sample" after running commands Run Telegraf with the example configuration file:

Build Telegraf success
If the building process ends successfully, a file named "telegraf" will be genarated in folder "go/src/github.com/influxdata/telegraf"
2.3.3 Insert data from InfluxDB
1: Preparation Prepare a file named data.csv. The example of the file is as follows:

In this file:
- 'm' column: the name of the table that you want to insert in InfluxDB
2: After editing file data.csv, copy this file to the folder /root and run the following command:
In this command:
- 'bucket_name': the name of the bucket that you want to insert in InfluxDB, for example: new
- 'org_id': Organization's ID in InfluxDB, for example: ca9f83af86e145cf
- 'token': The API token when you use to log in InfluxDB, for example : 'YQQlztmlUUuRam6W5DMtyQ5lgr0bB6sDlkR_V9XbevbQ2PvX-9Mtzy0vQ1zZTdjoOJ00XoKZgyAtVSZ1Lw2P2g=='
- 'influxdb_address': The address of your InfluxDB server, for example : http://10.116.45.51:8086
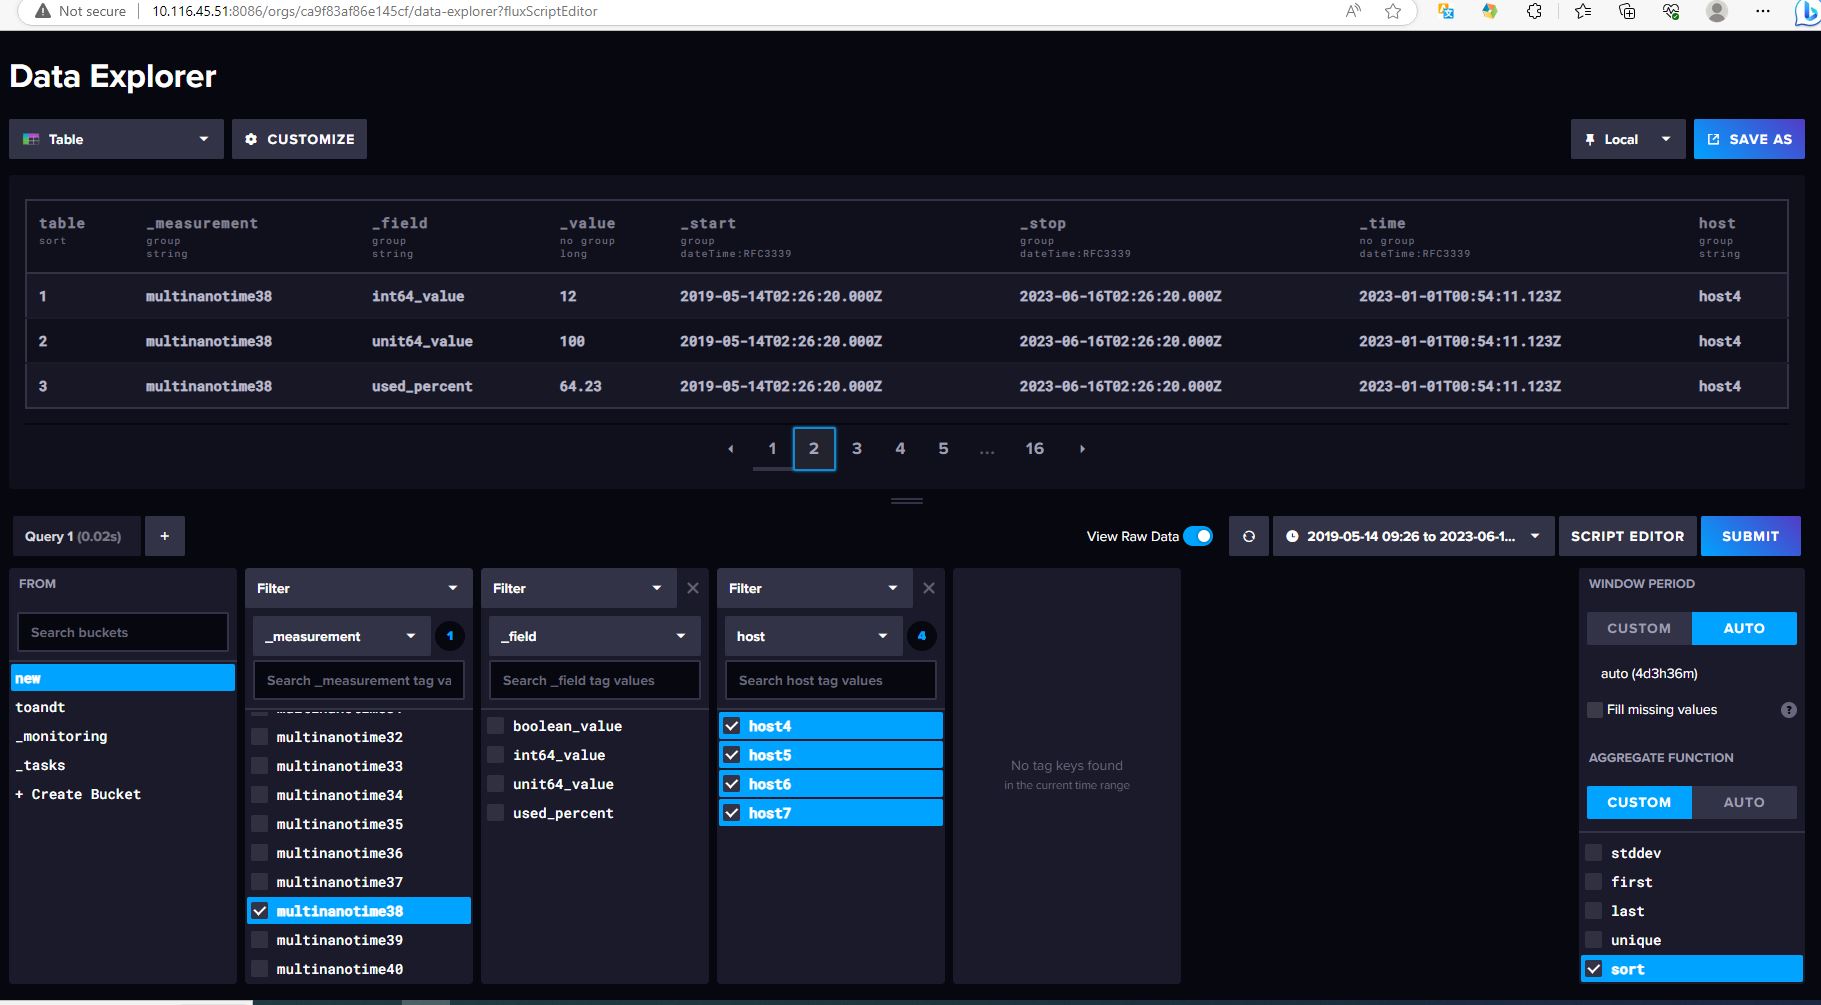
Check these data records in the InfluxDB server
[Note]:
If your machine is behind a proxy server, it is necessary to configure the proxy by using the following environment variables:
export https_proxy=http://username:password@host:port
export http_proxy=http://username:password@host:port
export no_proxy="host1,host2"
Add the proxy settings to the /etc/environment file; then run the command: source /etc/environment.
3 How to use
3.1 Input plugin configuration
The input plugin is out of scope of this guideline, refer to https://docs.influxdata.com/telegraf/v1.19/plugins/ for detail.
The next two sections provide some examples you can use:
3.1.1 Exec input plugin
The Exec input plugin is used to execute one or more Linux commands. In these examples, a command to query data from InfluxDB is used.
[Note]:
- Refer to https://github.com/influxdata/telegraf/blob/release-1.19/plugins/inputs/exec/README.md for detail.
- It requires to use
csv-parse v4.16.3(the plugin does not work with a newer version of csv-parse at this time):
Parameters
| Parameter | Description |
|---|---|
| commands | A list of commands used to query data from InfluxDB (required) |
| timeout | Timeout for each command to complete |
| data_format | The format of the output obtained after running the command specified in the command parameter *(required) |
Examples
Configuration of ./griddb.conf
- Configure the Exec input plugin to query data from InfluxDB:
# Use FluxDB v2
[[inputs.exec]]
    commands = [
        '''
            bash -c 'curl -sS --location \
                --request POST "{your_influxdb_host:port}/api/v2/query/?orgID={your_influxdb_orgID}" \
                --header "Accept: application/json" \
                --header "Content-type: application/vnd.flux" \
                --header "Authorization: Token {influxdb_authentication_token}" \
                --data-raw '"'"'
                    from(bucket:"bucketname")
                    |>range(start:-10y, stop: 10y)
                    |> filter(fn:(r) => r._measurement == "tablename")
                    '"'"' \
                | node parseInfluxDBResponse.js
         '
        ''' ]

    timeout = "10s"
    data_format = "influx"
Alternatively, you can create a
run.shfile which includes a command to query data fromInfluxDB:- Create a
run.shfile as below:
curl -sS --location \ --request POST "{your_influxdb_host:port}/api/v2/query/?orgID={your_influxdb_orgID}" \ --header "Accept: application/json" \ --header "Content-type: application/vnd.flux" \ --header "Authorization: Token {influxdb_authentication_token}" \ --data-raw ' from(bucket:"bucketname") |>range(start:-10y, stop: 10y) |> filter(fn:(r) => r._measurement == "tablename") ' \ | node parseInfluxDBResponse.js- Configure the input plugin as below:
# Use FluxDB v2 [[inputs.exec]] commands = ["sh /path/to/file/run.sh"] timeout = "10s" data_format = "influx"- Create a
You can create as many inputs as the number of commands used to query data from InfluxDB which you want to execute (for example, multiple query commands for different buckets and for different time ranges).
This can be done by creating a new
.shfile to query other data.Example for
run2.sh:curl -sS --location \ --request POST "{your_influxdb_host:port}/api/v2/query/?orgID={your_influxdb_orgID}" \ --header "Accept: application/json" \ --header "Content-type: application/vnd.flux" \ --header "Authorization: Token {influxdb_authentication_token}" \ --data-raw ' from(bucket:"bucketname2") |>range(start:-1y, stop: 1y) |> filter(fn:(r) => r._measurement == "tablename2") ' \ | node parseInfluxDBResponse.jsAdd the file to
./griddb.confas an input plugin configuration[[inputs.exec]].Example for multiple inputs:
# input 1
[[inputs.exec]]
    commands = ["sh /path/to/file/run.sh"]
    timeout = "10s"
    data_format = "influx"


# input 2
[[inputs.exec]]
    commands = ["sh /path/to/file/run2.sh"]
    timeout = "10s"
    data_format = "influx"
3.1.2 Configure a command for querying data
[Note]: Refer to https://docs.influxdata.com/influxdb/v1.8/guides/query_data/ for detail.
Parameters
| Parameter | Description |
|---|---|
| orgID | Organization ID in InfluxDB (required) |
| Authorization | Authentication token for obtaining data from InfluxDB (required) |
| bucket | A bucket name in InfluxDB (required) |
| r._measurement | A table of buckets which you want to get data from. If you want to get data from all tables, comment it out with "//" or delete this line. |
| range | Time range for which data is obtained from InfluxDB |
Examples
Example command for querying one table in a bucket:
curl -sS --location \
        --request POST "{your_influxdb_host:port}/api/v2/query/?orgID={your_influxdb_orgID}" \
        --header "Accept: application/json" \
        --header "Content-type: application/vnd.flux" \
        --header "Authorization: Token {influxdb_authentication_token}" \
        --data-raw '
            from(bucket:"bucketname")
            |>range(start:-10y, stop: 10y)
            |> filter(fn:(r) => r._measurement == "tablename")
           ' \
        | node parseInfluxDBResponse.js
Example command for querying all tables in a bucket:
curl -sS --location \
                --request POST "{your_influxdb_host:port}/api/v2/query/?orgID={your_influxdb_orgID}" \
                --header "Accept: application/json" \
                --header "Content-type: application/vnd.flux" \
                --header "Authorization: Token {influxdb_authentication_token}" \
                --data-raw '
                    from(bucket:"bucketname")
                    |>range(start:-10y, stop: 10y)
                   ' \
                | node parseInfluxDBResponse.js
[Note]: parseInfluxDBResponse.js, which is included in the source code of the GridDB output plugin for Telegraf, is used to parse InfluxDB responses.
3.2 Configure the output plugin
3.2.1 Parameters
| Parameter | Description |
|---|---|
| api_url | URL of GridDB Web API (required) Valid URL example: https://127.0.0.1:8080/griddb/v2/ |
| cluster_name | The name of a cluster in GridDB (required) |
| database | The name of a database in GridDB into which you want to insert data. The default is public. |
| username | The GridDB user. The GridDB user must have WRITE permissions to the database specified in the parameter "database". (required) |
| password | The password of the GridDB user (required) |
| update_mode | Insert mode option: 'replace' or 'append'. The default is 'append'. |
| containers | A list of tables that you want to insert into GridDB in array format. If the list is empty, all tables will be outputted. |
| timestamp_column | The name of the timestamp column (the first column) in a timeseries container in GridDB. This column always has a row key. If this parameter is not specified, container is not created |
| is_timeseries | The type of a container. If it is true, the container type becomes TimeSeries. If it is false, the container type becomes Collection. The default value is false |
- When the
appendmode is specified to insert data, if a container does not exist, a new one is created to insert data. If a container already exists, the current one is kept to insert data. - When the
replacemode is specified to insert data, if a container does not exist, a new one is created to insert data. If a container already exists, the current one is deleted and a new one is created to insert data.
3.2.2 Example
Below is a detailed example for using the GridDB output plugin.
# GridDB plugin for Telegraf to transfer non-GridDB resources to GridDB
[[outputs.griddb]]
    ## GridDB WebAPI URL
    api_url = "https://127.0.0.1:8080/griddb/v2/"

    ## Database name
    ## # Optional; the default is public.
    database = "database"

    ## Cluster name
    cluster_name = "clustername"

    ## GridDB username
    username = "username"

    ## GridDB password
    password = "password"

    ## Delete the existing container if it exists.
    ## # Optional; the default is append.
    ## # Accepted values: replace, append
    ##     - replace: Override the existing container.
    ##     - append:  Append new rows to the existing container.
    update_mode = "append"

    ## A list of tables to be transferred to GridDB
    ## # Example: ["cpu", "ram", "product"]
    ## # An empty list [] means ALL containers.
    ## # Optional; the default is [].
    containers = []
    timestamp_column = "timestamp"

    ## The type of a container. If it is true, the container type becomes TimeSeries. If it is false, the container type becomes Collection. The default value is false
    is_timeseries= true
3.3 Example for full input-output plugin configuration
Example: The full configuration for the InfluxDB input plugin and the GridDB output plugin:
# Telegraf Configuration
###############################################################################
#                            OUTPUT PLUGINS                                   #
###############################################################################
# GridDB plugin for Telegraf to transfer non-GridDB resources to GridDB
[[outputs.griddb]]
    ## GridDB WebAPI URL
    api_url = "https://{please_fill_full_uri}"
    ## Database name
    database = "database"
    ## Cluster name
    cluster_name = "clustername"
    ## GridDB username
    username = "username"
    ## GridDB password
    password = "password"
    ## Delete the existing container if it exists.
    update_mode = "append"
    ## A list of tables to be transferred to GridDB
    containers = []
    ## Name of the timestamp column. If timestampColumn is empty, a timestamp column is not added to the first column of the container.
    timestamp_column = "timestamp"
     ## The type of a container. If it is true, the container type becomes TimeSeries. If it is false, the container type becomes Collection. The default value is false
    is_timeseries= true

###############################################################################
#                            INPUT PLUGINS                                    #
###############################################################################

# Use FluxDB v2
[[inputs.exec]]
    commands = [
        '''
            bash -c 'curl -sS --location \
                --request POST "{your_influxdb_host:port}/api/v2/query/?orgID={your_influxdb_orgID}" \
                --header "Accept: application/json" \
                --header "Content-type: application/vnd.flux" \
                --header "Authorization: Token {influxdb_authentication_token}" \
                --data-raw '"'"'
                    from(bucket:"bucketname")
                    |>range(start:-10y, stop: 10y)
                    |> filter(fn:(r) => r._measurement == "tablename")
                    '"'"' \
                | node parseInfluxDBResponse.js
         '
        ''' ]

    timeout = "10s"
    data_format = "influx"
[Note]:
If there is too much data in InfluxDB, change the
intervalparameter in the agent configuration filegriddb.confto prevent migration failure.
Example:# Configuration for the telegraf agent [agent] ## Data collection interval for all inputs ## To migrate data from InfluxDB to GridDB, the interval is set to a large enough number. ## After all data is migrated, the telegraf process can be terminated. interval = "99999999s"Refer to the full configuration file
griddb.confin the source code of the GridDB output plugin for Telegraf for detail.

