Power BI collaboration guide
Revision: 1.5.0-9417-7fa03c1d
1 Introduction
1.1 Organization of this document
This document describes how to use GridDB Cloud and Power BI in combination. The following is a summary of each chapter.
Introduction
Chapter 1 describes the organization of this document and terminology.About Power BI
Chapter 2 explains Power BI.Data integration in Web API
Chapter 3 introduces an example for integrating data that is output by Web API provided by GridDB Cloud and for analyzing that data using Power BI.File integration Chapter 4 introduces an example for integrating a data file that is output by GridDB Cloud and for analyzing that data using Power BI.
Data integration through the on-premises data gateway
Chapter 5 introduces an example for integrating data obtained from GridDB Cloud through on-premises data gateway and for analyzing that data using Power BI.
1.2 Terminology
The following are a term and its description used in this document.
| Term | Description |
|---|---|
| Management GUI | a Web application to manage GridDB Cloud. |
2 About Power BI
2.1 Overview
Power BI is a collection of BI tools and services for data analysis provided by Microsoft.
By combining GridDB Cloud and Power BI, it is possible to analyze data held by GridDB Cloud.
This document describes how to use "Power BI Desktop"/"Power BI Service", both of which can analyze data and GridDB Cloud, in combination.
Note that in addition to analyzing data, Power BI allows to share analysis results and embed them in a Web page.
For details, see the official documentation provided by Microsoft.
2.2 Means of collaboration
The following means are available for analyzing data by combining GridDB Cloud and Power BI.
Data integration in Web API
Integrate data output by Web API that GridDB Cloud provides and analyze data.
This means of collaboration for analysis is available only for "Power BI Desktop".File integration
Integrate a data file output by Management GUI that GridDB Cloud provides and analyze data.
This means of collaboration for analysis is available both for the "Power BI Service" and "Power BI Desktop".Data integration through the on-premises data gateway
Introduce the on-premises data gateway provided by Microsoft into a VM (Windows VM) you have prepared and perform data analysis based on the data integrated through the on-premises data gateway.
Note that in this case the "Power BI Service" retrieves and updates data through the on-premises data gateway based on the information generated by "Power BI Desktop".
As such, both "Power BI Desk" and the "Power BI Service" are required. In other words, it is not possible to work with only one of the two.
3 Data integration in Web API
3.1 Overview
This chapter describes how to exchange data between GridDB Cloud and Power BI via Web API and perform data analysis.
3.2 Required resources
The following are the resources and settings required to use file integration and analyze data.
Note this document does not include the procedure for preparing each of the resources.
3.2.1 Resources required to work with "Power BI Desktop"
- Power BI Desktop
Download Power BI Desktop from the official Microsoft page and install it on the terminal where analysis is performed.
Note that Power BI Desktop works even without a Power BI account.
3.2.2 Import into Power BI Desktop
Import data into Power BI Desktop.
Launch Power BI Desktop on the terminal.
![]() or
or 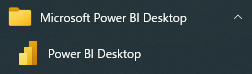
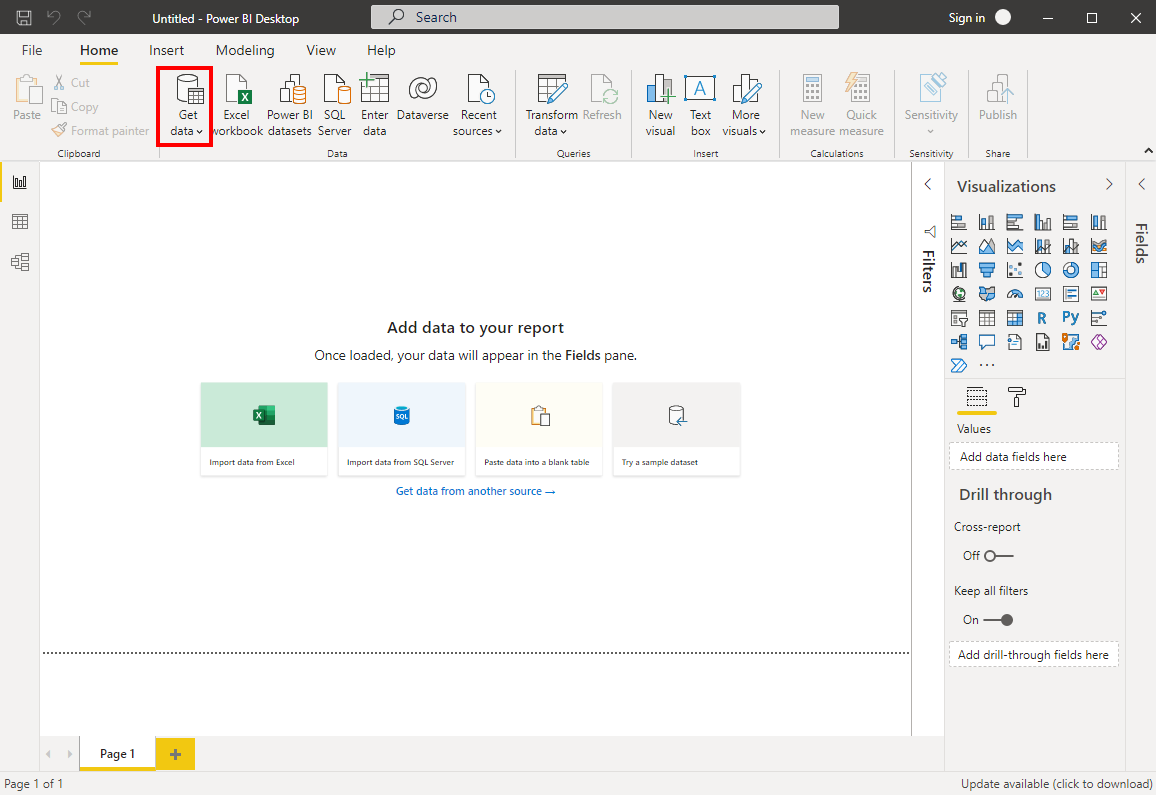
Once it is launched, press [Get data].
Press [Blank query].
![]()
Once the [Power Query Editor] window appears, select [Home] > [Query] and press [Advanced Editor].
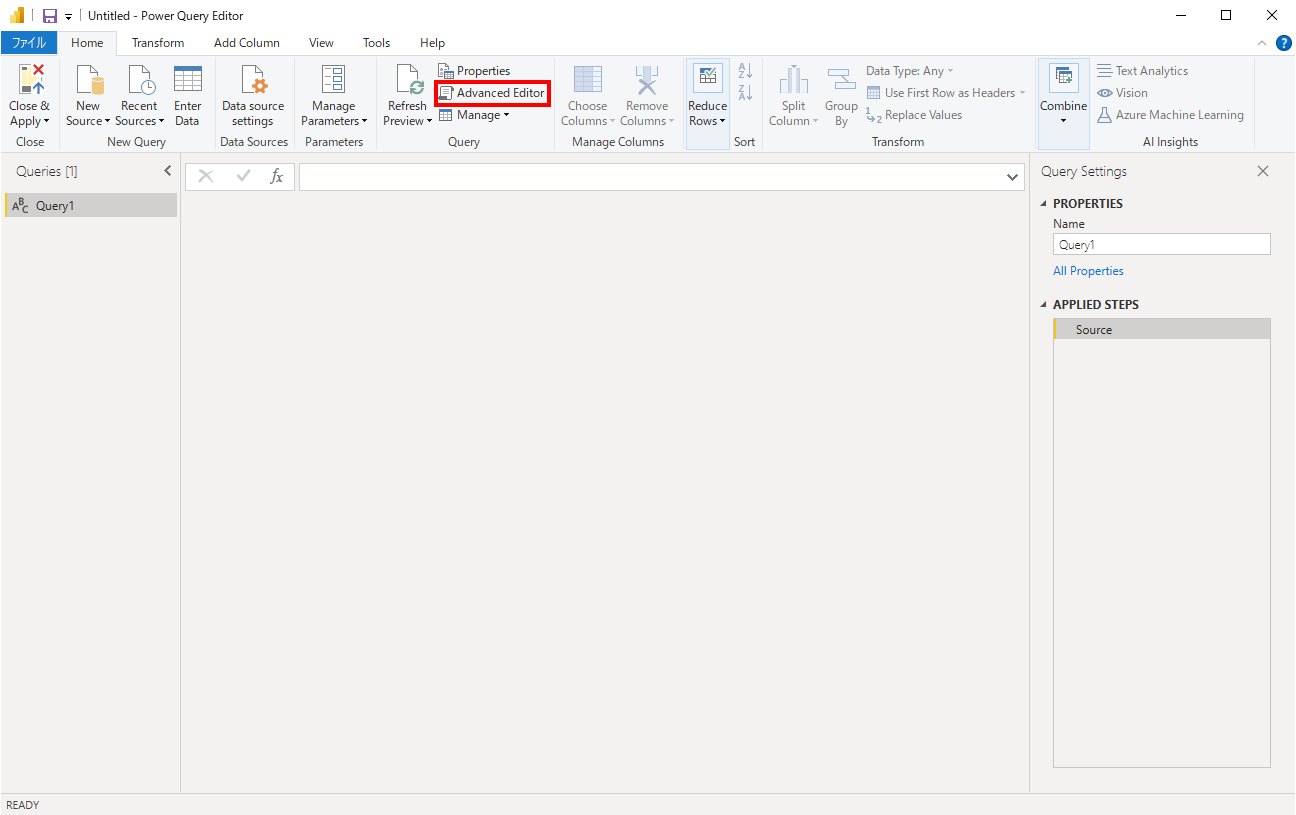
The [Advanced Editor] will then appear.
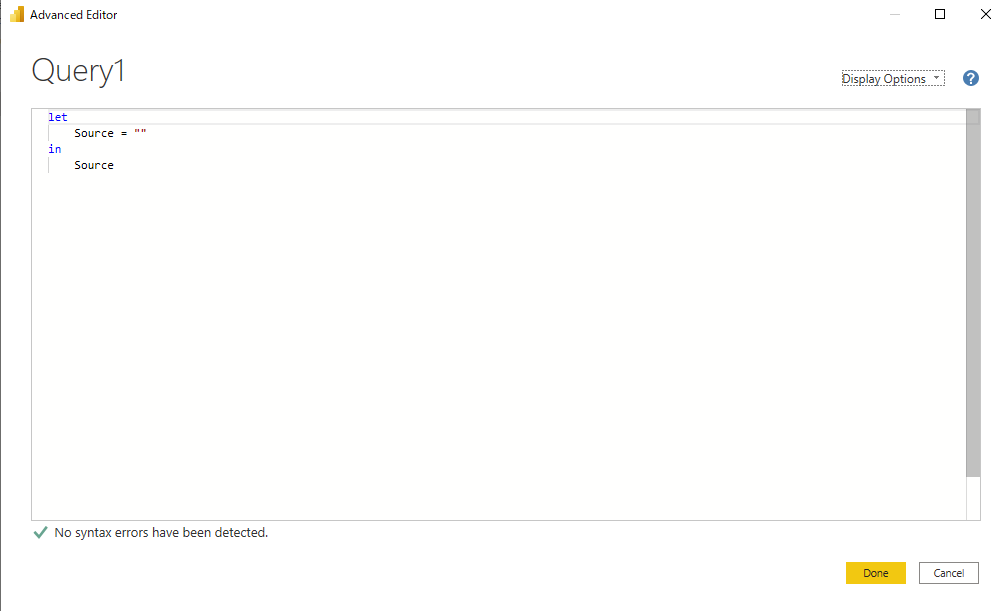
Paste the following in the window and press [Done].
let
    url = "{URL}/{cluster name}/dbs/{database name}/sql",
    headers = [#"Content-Type" = "application/json; charset=UTF-8", #"Authorization" = "{authentication information}"],
    postData = Text.ToBinary("[{""type"":""sql-select"", ""stmt"":""{SQL}""}]"),
    response = Web.Contents(
        url,
        [
            Headers = headers,
            Content = postData
        ]
    ),
    jsonResponse = Json.Document(response),
    json = jsonResponse{0},
    rows = json[results],
    columns = json[columns],
    columntable = Table.FromRecords(columns),
    columnlist = Table.ToList(Table.SelectColumns(columntable, "name")),
    container = Table.FromRows(rows, columnlist)
in
    container
The strings in the braces ({}) must be replaced with the actual data before pasting the text.
For details, see the following table:
| Items | Description |
|---|---|
| URL | URL of Web API we have provided in advance. |
| cluster name | cluster name we have provided in advance. |
| database name | name of a database to be connected to. |
| authentication information | Specify in the Basic authentication scheme a user name and its password used when connecting a database. |
| SQL | SQL statement issued when retrieving data. |
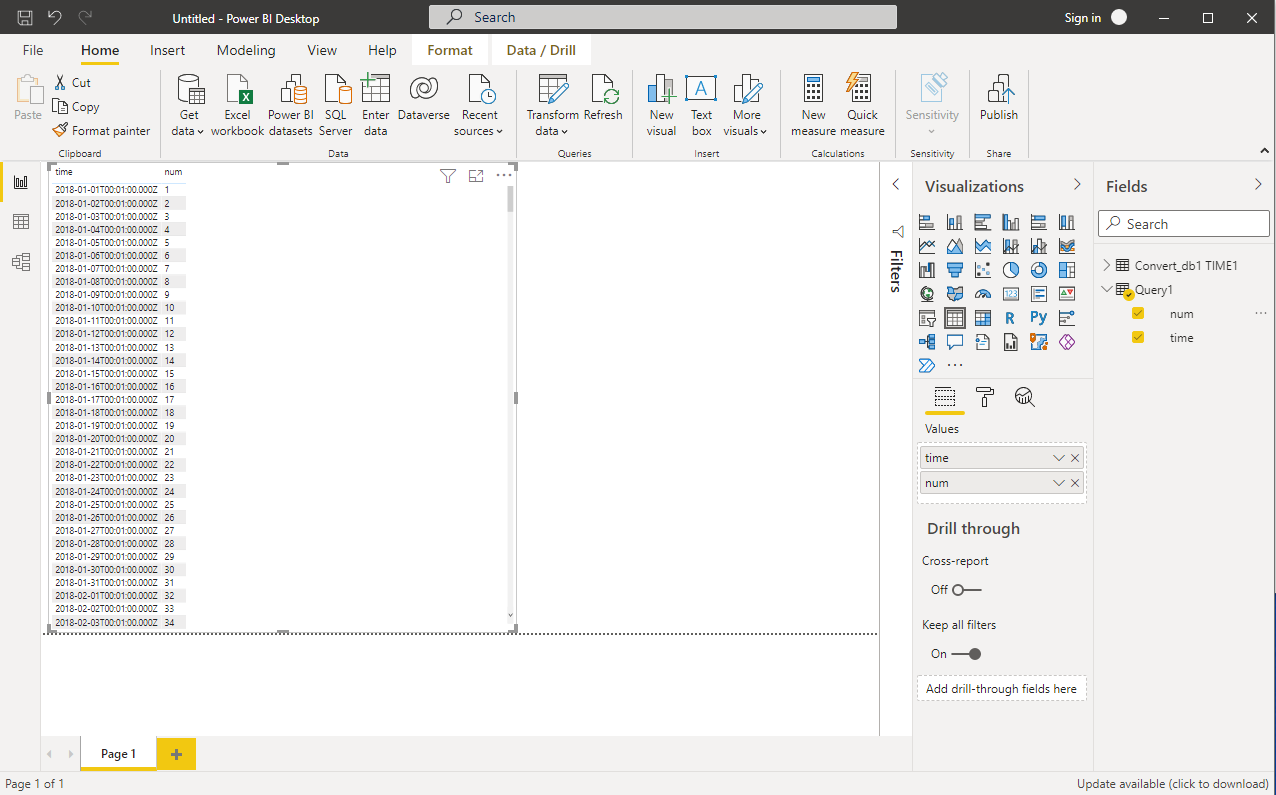
A preview of the data is displayed in the window. Check the content and if no problem is found, select [Close & Apply].
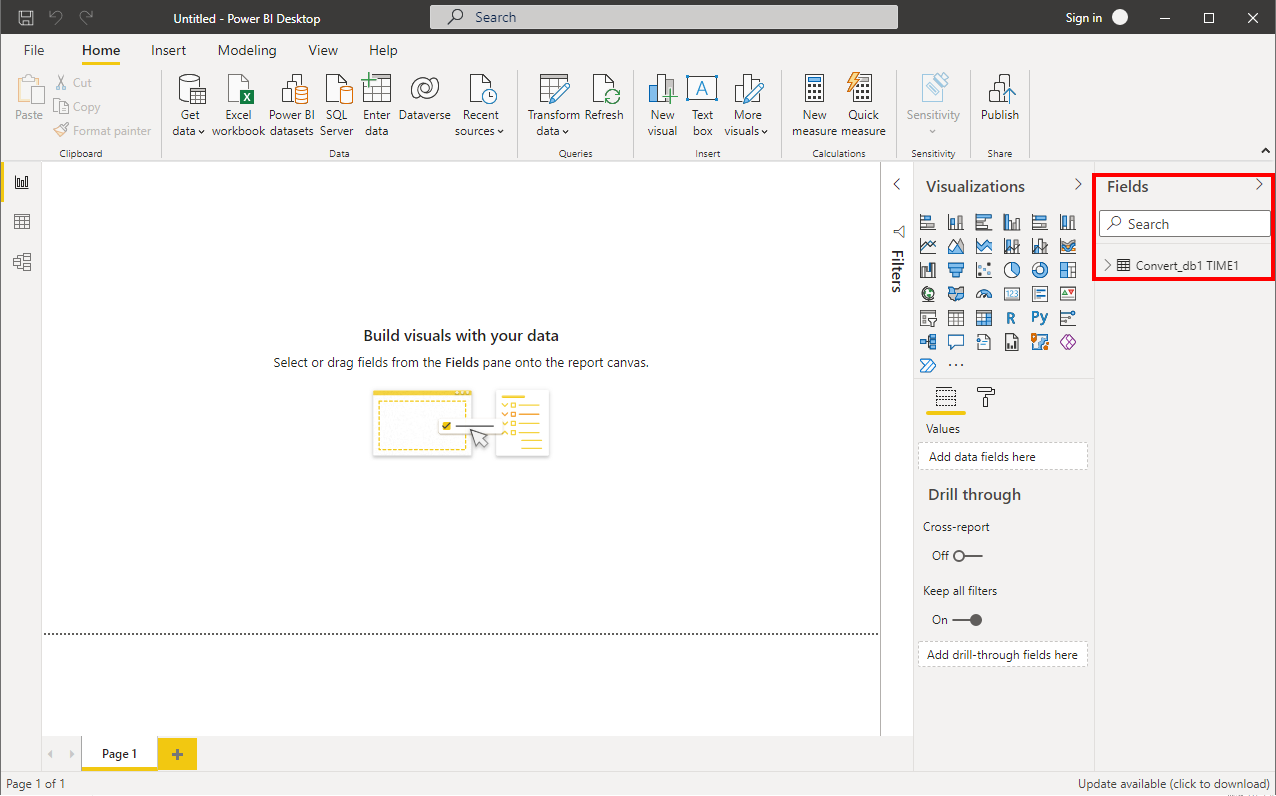
The data retrieved via Web API is thus imported into Power BI Desktop and applied to the Fields pane.
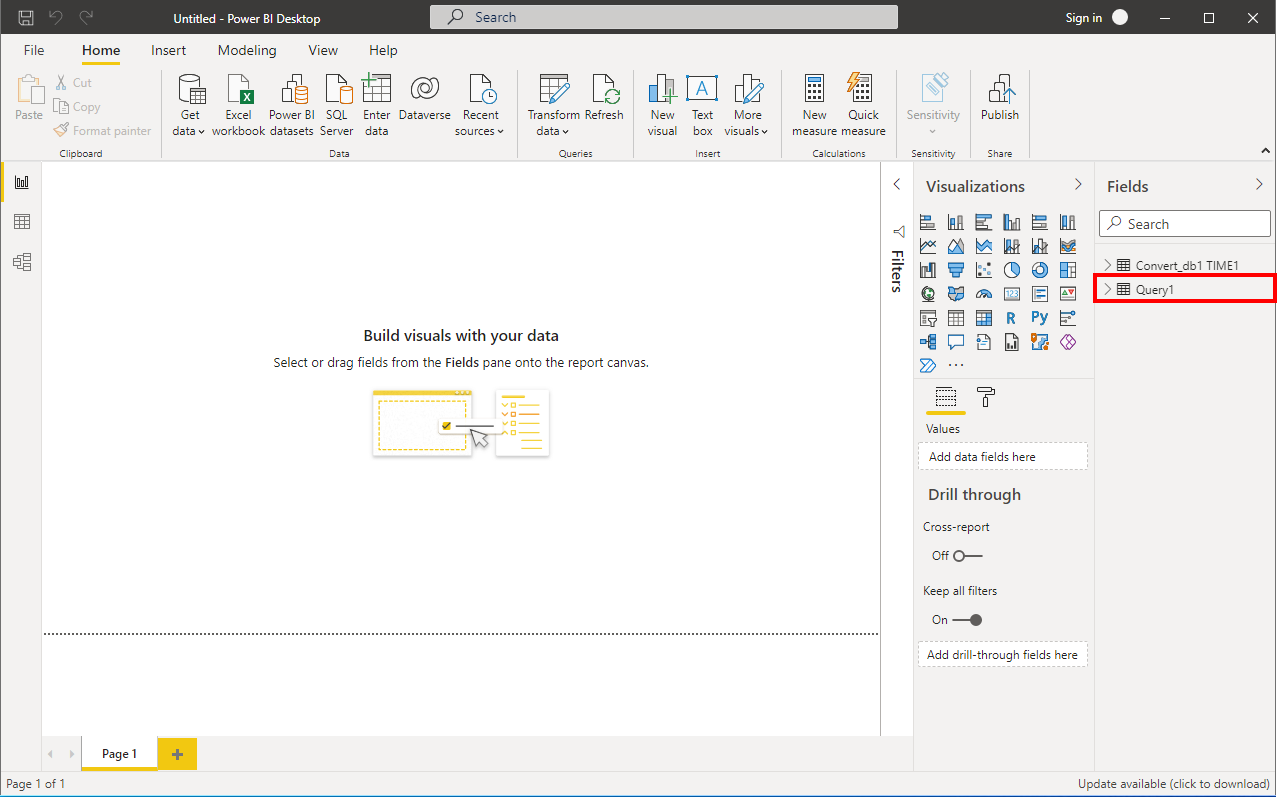
In the Fields pane, select data used for the axes and their values and set chart filters. This makes the data available to be analyzed in Power BI Desktop.
4 File integration
4.1 Overview
This chapter describes how to exchange a data file between GridDB Cloud and Power BI and analyze data.
4.2 Required resources
The following are the resources and settings required to use file integration and analyze data.
Note this document does not include the procedure for preparing each of the resources.
4.2.1 Resources required to work with "Power BI Desktop"
- Power BI Desktop
Download Power BI Desktop from the official Microsoft page and install it on the terminal where analysis is performed. Note that Power BI Desktop works even without a Power BI account.
4.2.2 Resources required to work with the "Power BI Service"
- Power BI account
Get a Power BI account on the official home page for Microsoft Power BI.
4.3 Procedure for integration
4.3.1 File download
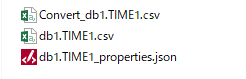
Download a file for data integration from Management GUI.
Download a zip file that contains CSV data by referring to "4.14 Export/Import function" in the "GridDB Cloud Management GUI Reference" (GridDB_Cloud_ManagementGui_Reference.html).
Unzip the downloaded zip file.
4.3.2 Data conversion
The CSV file downloaded from Management GUI does not have a title line at the top.
Moreover, it has four lines unnecessary for data analysis. This document describes how to perform data conversion using PowerShell that is preinstalled on Microsoft Windows.

This document describes how to perform data conversion using PowerShell that is preinstalled on Microsoft Windows.
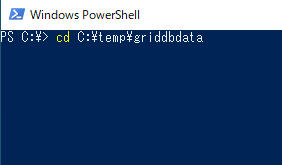
On the terminal where the file is downloaded, start PowerShell.
In PowerShell that is started, enter the following command to move to the directory where the file is saved.
Replace
cd <where the file is saved>
After moving to the designated directory, enter the following command on PowerShell.
Replace
$TARGET_CSV=Get-ChildItem "<CSV file name>"

Enter the following commands all together on PowerShell.
$CURRENT_PATH=(Convert-Path .)
$JSON_DATA=ConvertFrom-Json -InputObject (Get-Content -Path ((($TARGET_CSV).BaseName) + "_properties.json") -Raw)
$COL_NAME=$JSON_DATA.columnSet | ForEach-Object { $_.columnName }
$CSV=Import-Csv -Path $TARGET_CSV -Header $COL_NAME | Select-Object -Skip 4
$CSV | Export-Csv -Path ($CURRENT_PATH + "\Convert_" + ($TARGET_CSV.Name)) -Encoding Default -NoTypeInformation

Check that in a directory where the file is saved, a new file named "Convert_
4.3.3 Import into Power BI Desktop
Import data into Power BI Desktop.
Launch Power BI Desktop on the terminal.
![]() or
or
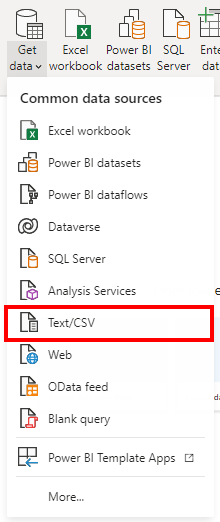
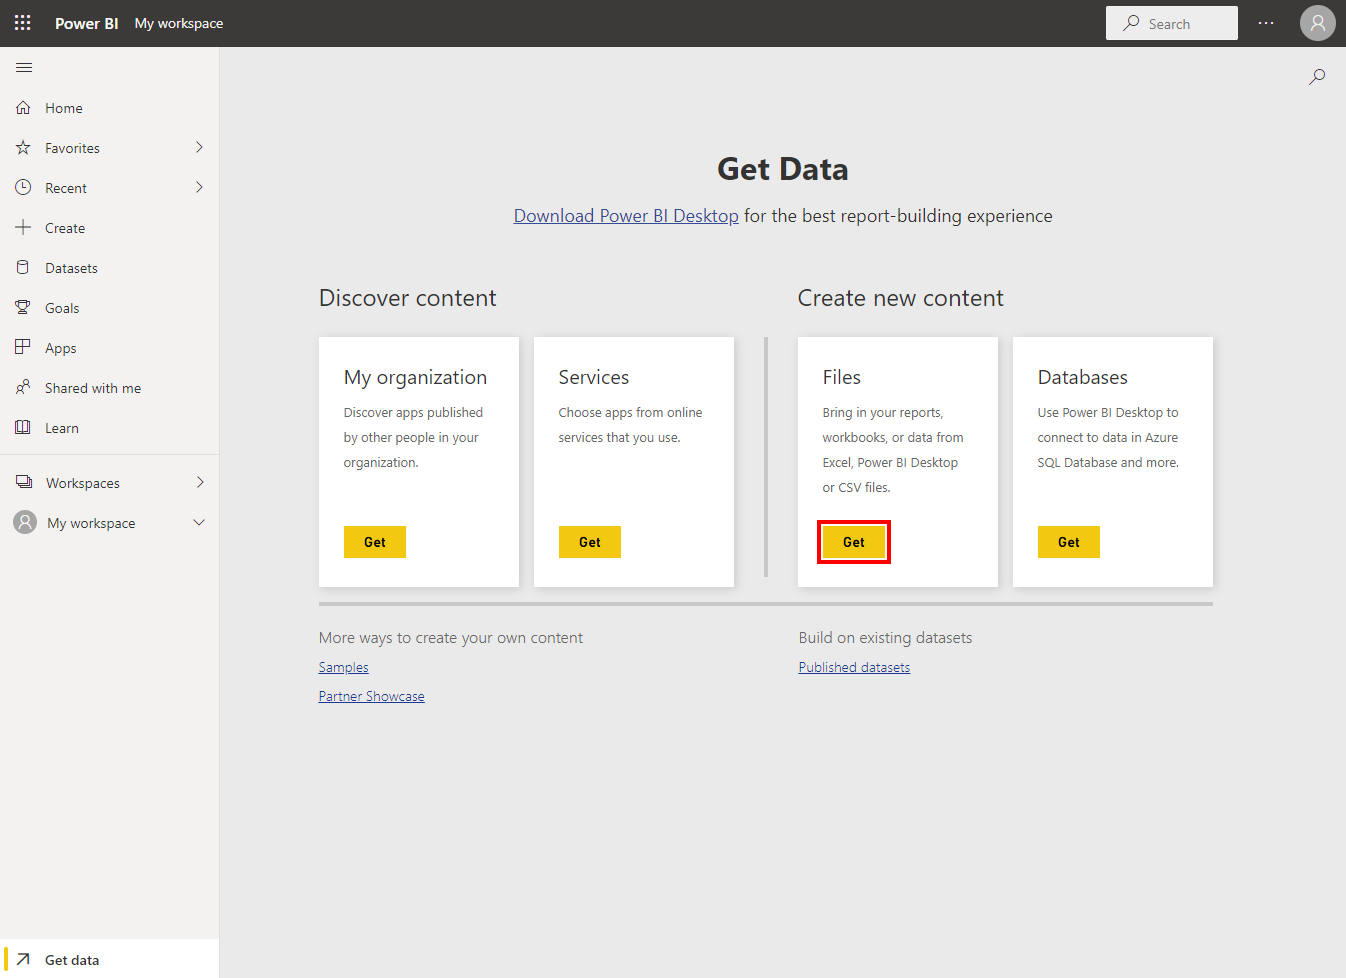
Once it is launched, press [Get data].
Press [Text/CSV].
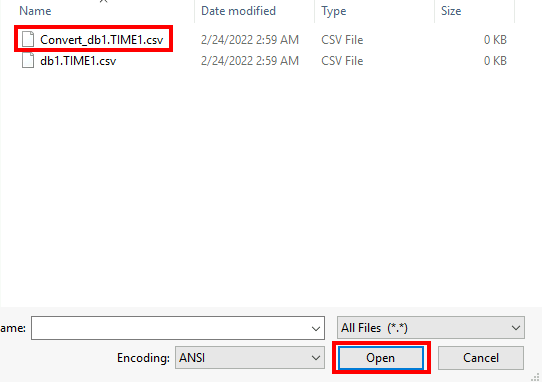
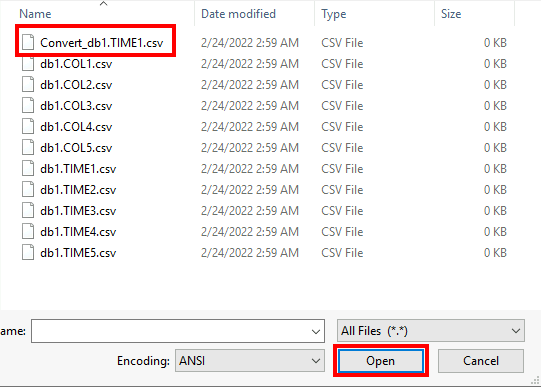
This action launches a file browser where a data file can be selected to open it. Select the data file to be imported and press [Open].
A preview of the data contained in the CSV file is displayed. Check the content and if no problem is found, select [Load].
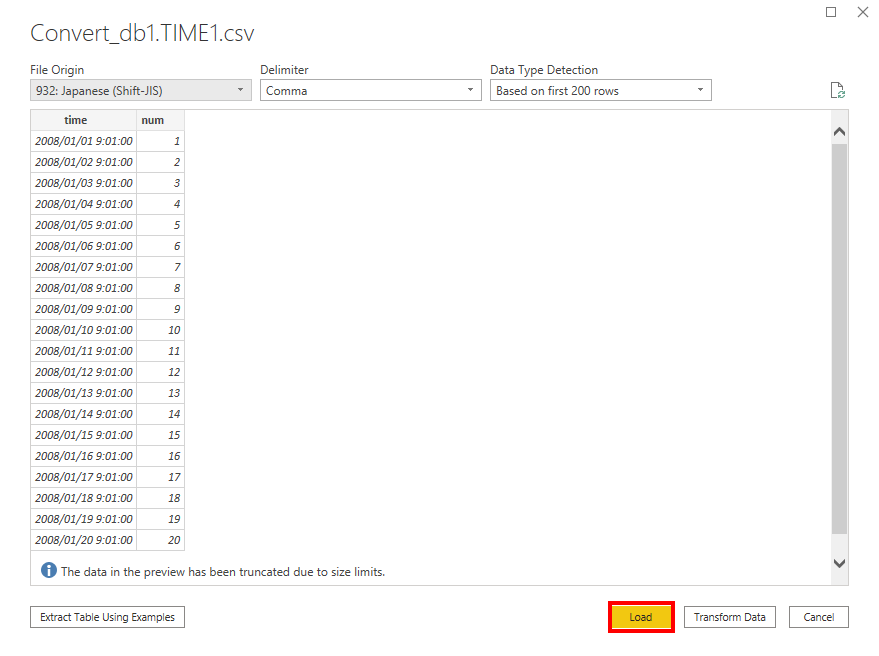
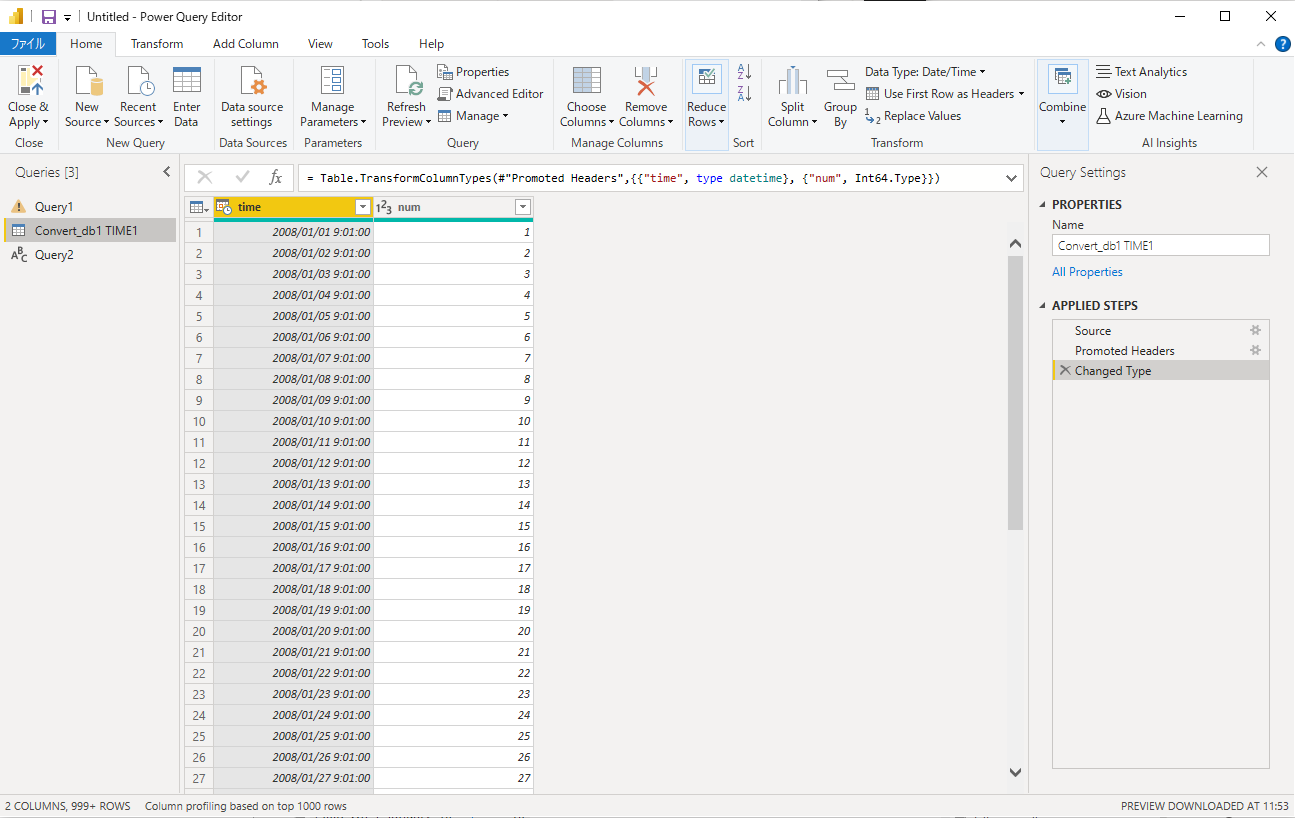
Alternatively, if you need to transform the data, for example, by "renaming column(s) or "deleting specific column(s)", select [Transform Data] and transform the data in the Power Query Editor that is open.
This document does not include the procedure for using the Power Query Editor. For details, see the Microsoft support page.
The data retrieved via a file is thus imported into Power BI Desktop and applied to the Fields pane, after which the data becomes available to be analyzed in Power BI Desktop.
In the Fields pane, select data used for the axes and their values and set chart filters. This makes the data available to be analyzed in Power BI Desktop.
4.3.4 Import into the Power BI Service
Import data into the Power BI Service.
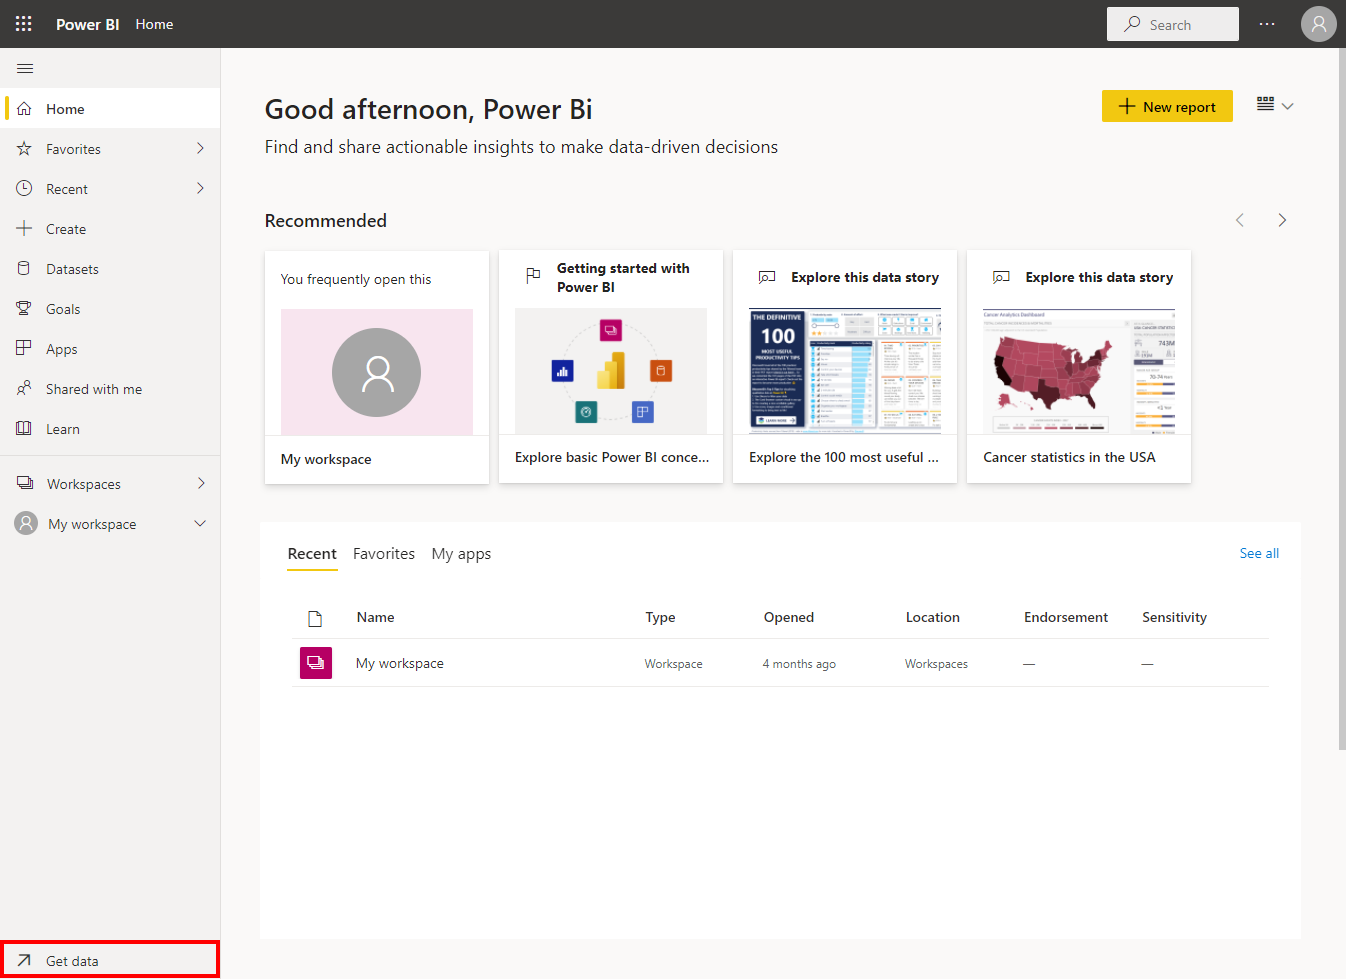
Start a Web browser and sign in to the Power BI Service.
Press [Get data] in the bottom-left corner of the window.
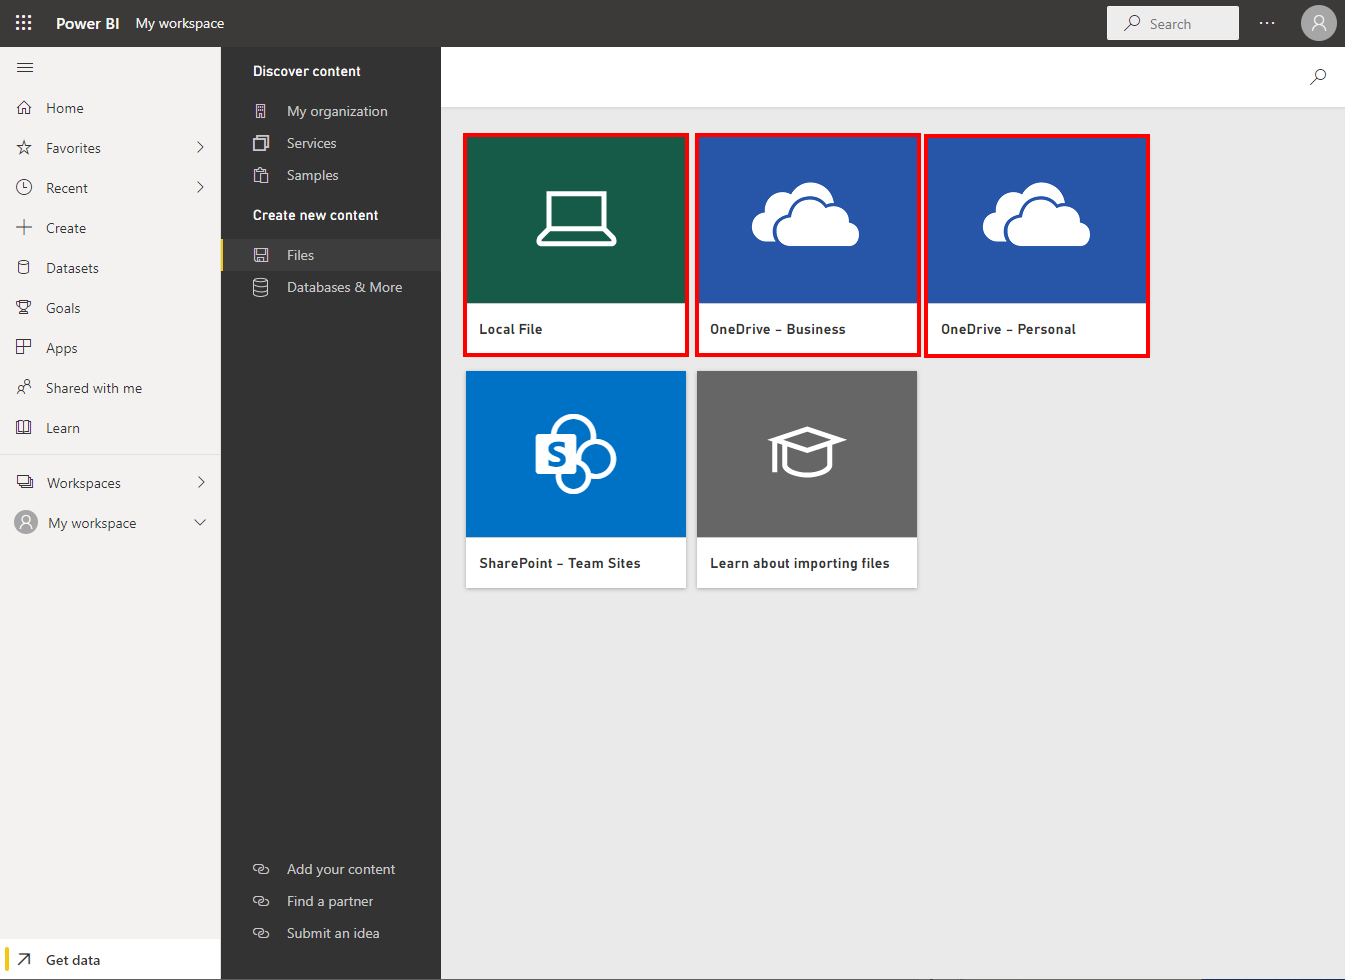
A window where data can be selected to access is displayed; select [Get] in Create new content > Files.
Select [Local File] or [OneDrive] wherever the data to be imported is saved.
Once it is selected, a file browser where a data file can be selected to open it will appear. Select the data file to be imported and press [Open].
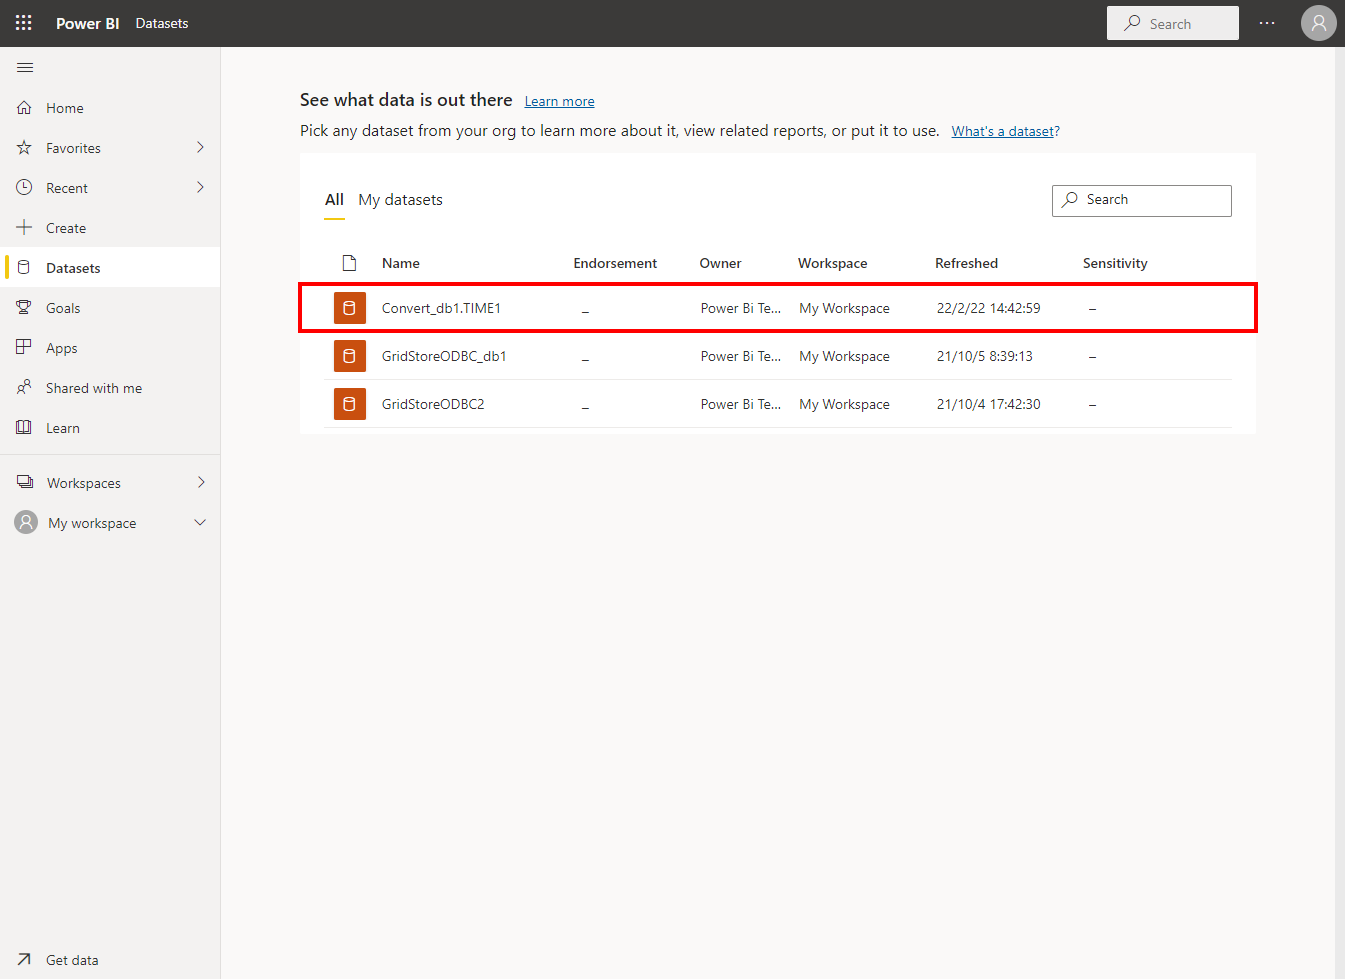
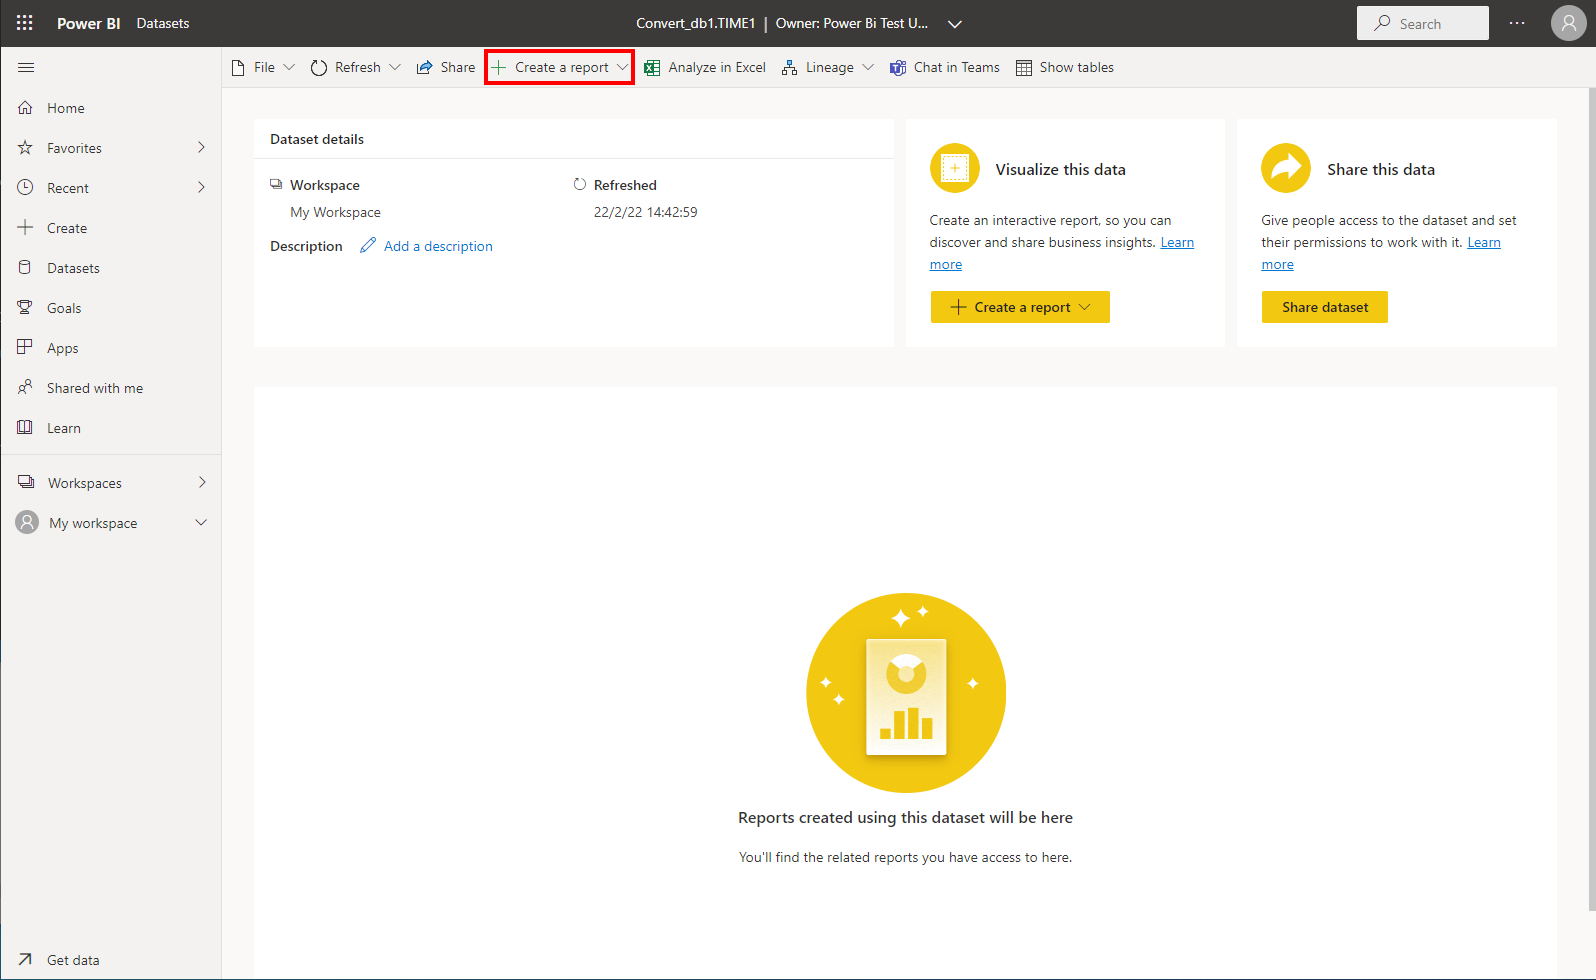
The data retrieved via a file is thus imported into the Power BI Service. Select [Datasets] from the menu on the bottom left of the window and check that the data (dataset) is displayed in the window.
Once the data is displayed, select that data and in the resulting menu, select [Create a report].
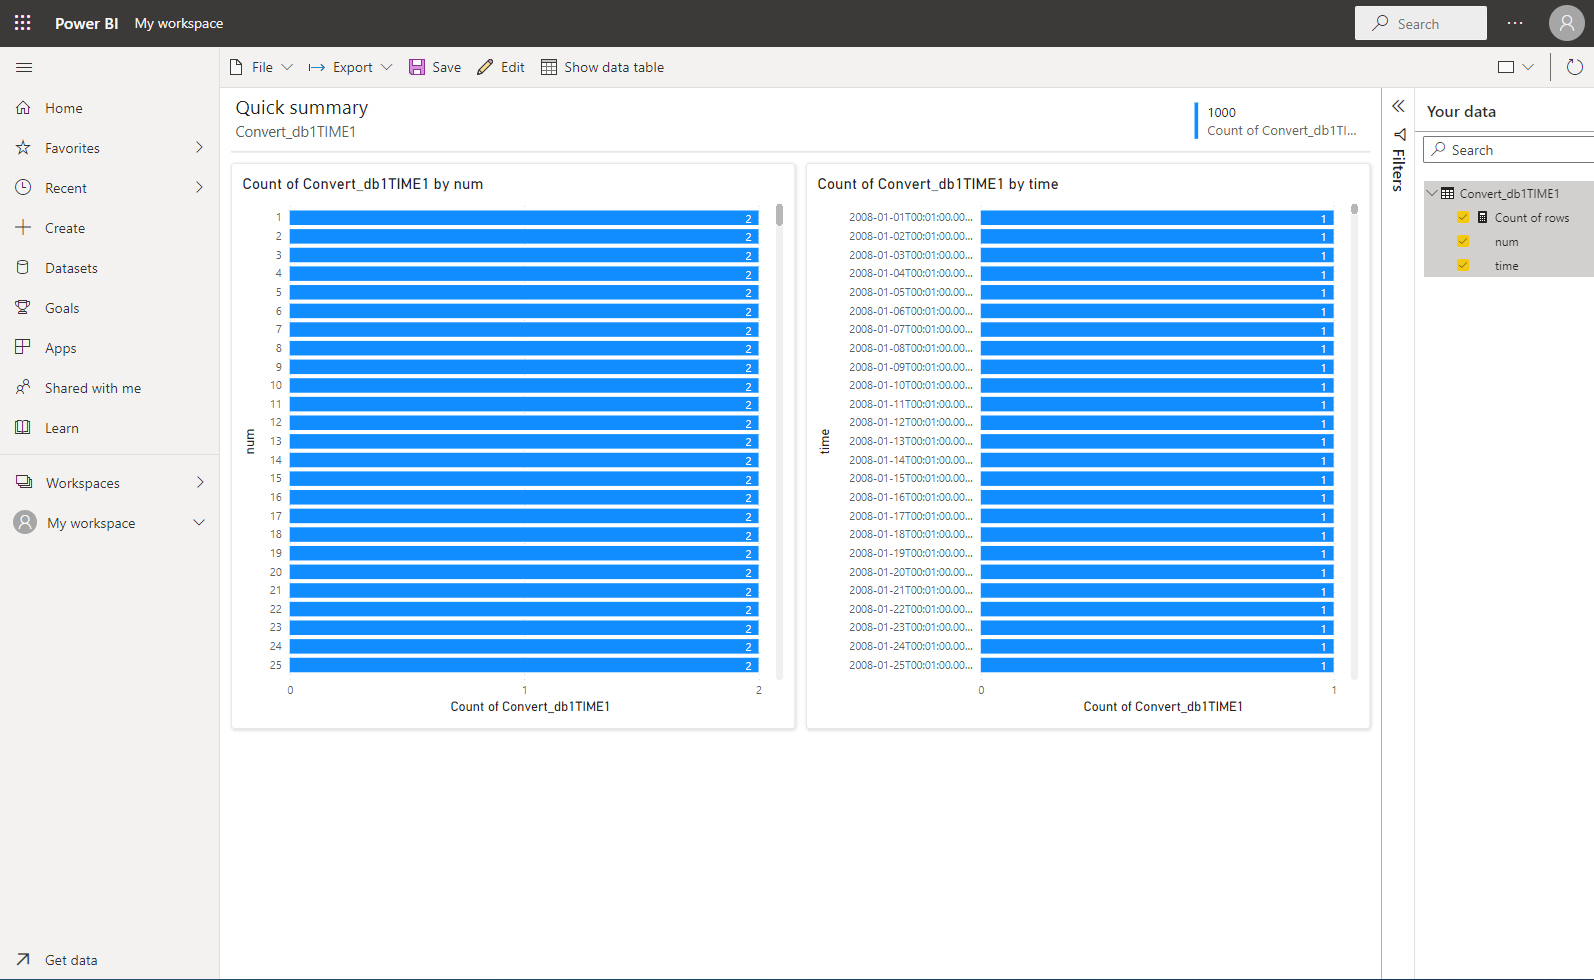
In the Fields pane, select data used for the axes and their values and set chart filters. This makes the data available to be analyzed in the Power BI Service.
5 Data integration through the on-premises data gateway
5.1 Overview
This chapter describes how to exchange data between GridDB Cloud and Power BI via on-premises data gateway and perform data analysis.
5.2 Required resources
The following are the resources and settings required to analyze data by combining GridDB Cloud and Power BI.
Note this document does not include the procedure for preparing each of the resources.
5.2.1 Resources required to work with the "Power BI Service"
- Power BI account Get a Power BI account on the official home page for Microsoft Power BI.
- Azure account
Create an account on the official home page for Microsoft Azure. - On-premises data gateway installer Get the installer on the official home page for Microsoft Power BI.
- GridDB ODBC driver
Download the driver from the support page for Management GUI. - Azure Virtual Network (VNet)
After creating an Azure account, create a VNet on the [Virtual networks] screen in the Azure Portal. - Windows VM
After creating an Azure account, create a Windows VM on the [Virtual Machines] screen in the Azure Portal. Note that the recommended configuration for an on-premises data gateway is defined by Microsoft. For details, see the official documentation provided by Microsoft. - Power BI Desktop Download Power BI Desktop from the official Microsoft page and install it on a Windows VM.
- Virtual Network peering (peering connection) Set Virtual Network peering using Management GUI by referring to the "GridDB Cloud Management GUI Reference" (GridDB_Cloud_ManagementGui_Reference.html).
5.3 Procedure for integration
5.3.1 Installing the ODBC driver
Install the ODBC driver on a Windows VM by referring to the "GridDB OCBC Driver Guide" (GridDB_ODBC_Driver_UserGuide.html).
5.3.2 Building a gateway
Install an on-premises data gateway on a Windows VM by referring to the official documentation provided by Microsoft.
5.3.3 Working with the Power BI Service
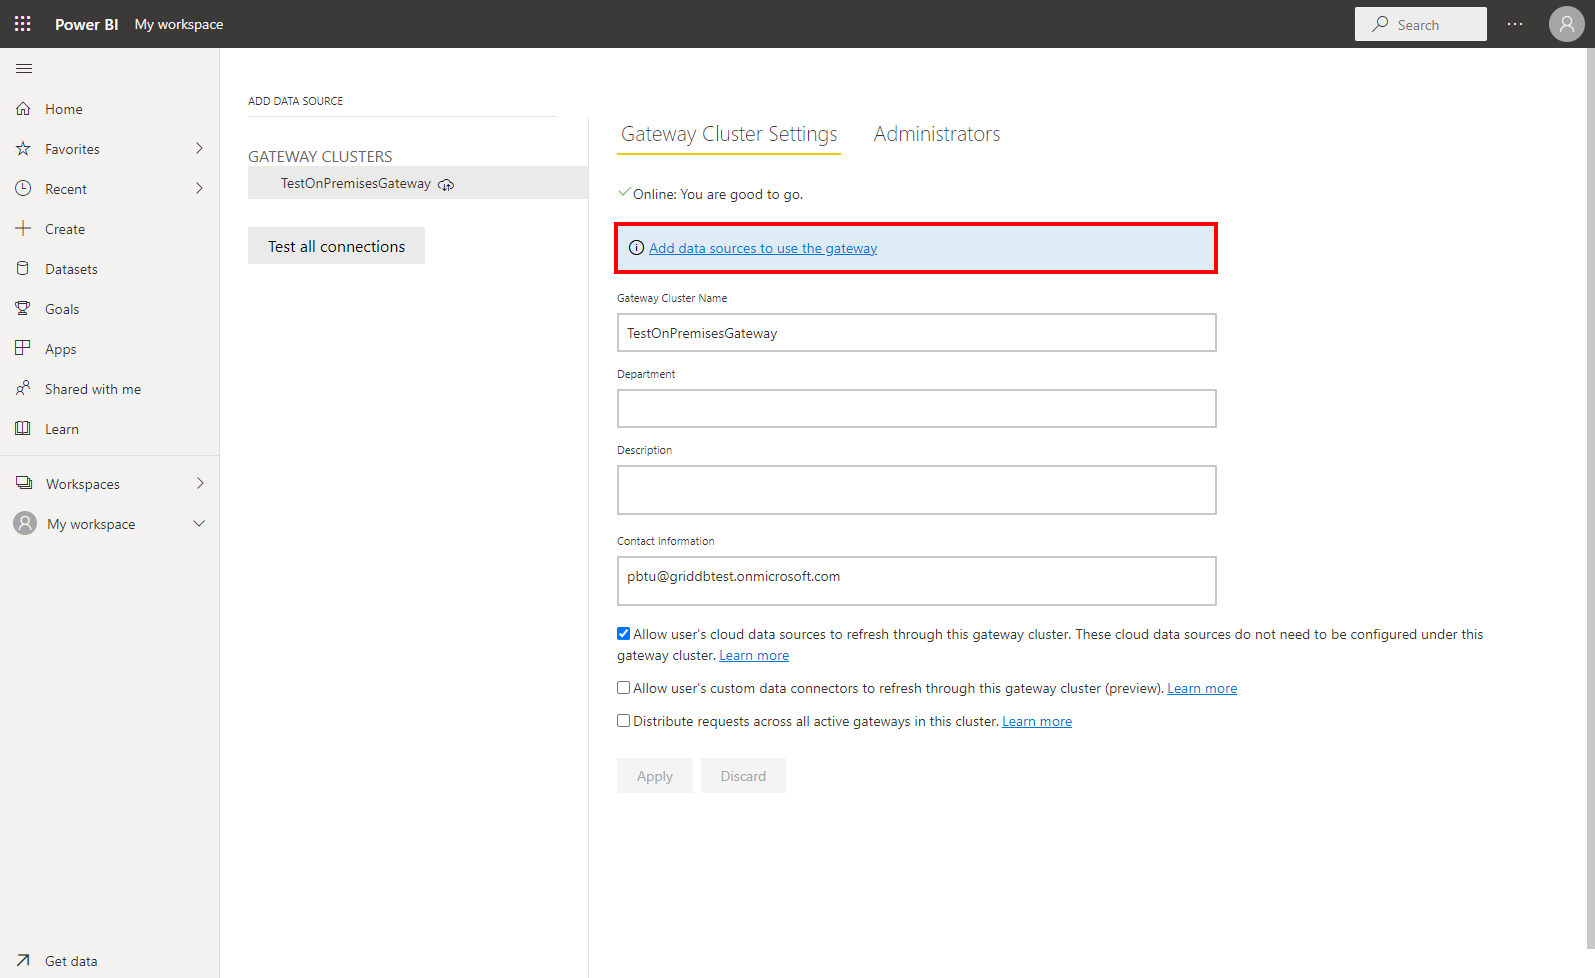
Add an on-premises data gateway in the Power BI Service.
Start a Web browser and sign in to the Power BI Service.
Select [Manage gateways] in the settings on the upper right of the window.

Select a gateway and then select [Add data source].
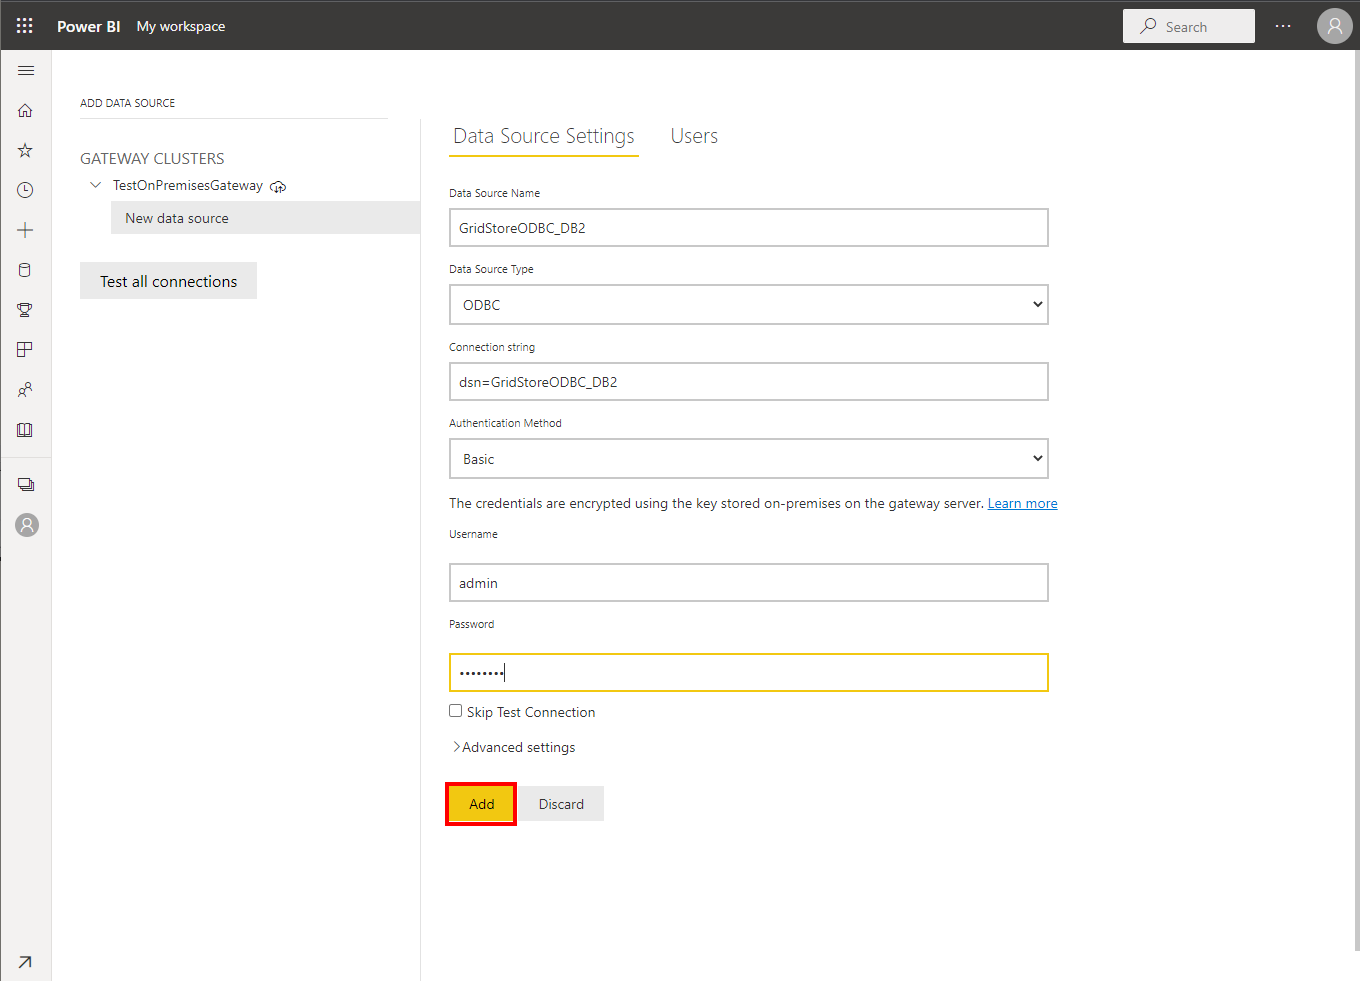
Enter the following information for each item.
| Item | Description |
|---|---|
| Data Source Name | any name |
| Data Source Type | ODBC |
| Connection String | system DSN |
| Authentication Method | Basic |
| Username, | connection user name |
| Password | connection user password |
For the details about each item, see below:
Data Source Name
Specify any name that can identify a data source.
The name specified here is used as a data source name in the Power BI Service.Data Source Type
For our purpose, specify "ODBC" to connect to GridDB Cloud via the ODBC driver.Connection String
Specify the system DSN that was set up during the ODBC driver installation.
For details, see "1.4 Registration of ODBC data source" in the "GridDB OCBC Driver Guide" (GridDB_ODBC_Driver_UserGuide.html).Authentication Method
For our purpose, specify "Basic" to connect to GridDB Cloud using Basic authentication.Username
Specify a user name used during connection.
If a user has not been created, you can create it after logging in to Management GUI and accessing the [Security] screen.
For details, see "4.13.3 Creating a database user" in the "GridDB Cloud Management GUI Reference" (GridDB_Cloud_ManagementGui_Reference.html).Password Specify a user password used during connection.
If a user has not been created, you can create it after logging in to Management GUI and accessing the [Security] screen.
For details, see "4.13.3 Creating a database user" in the "GridDB Cloud Management GUI Reference" (GridDB_Cloud_ManagementGui_Reference.html).
After completing the settings, select [Add] and on the same screen, check that the connection is successful.
5.3.4 Working with Power BI Desktop
Connect to GridDB Cloud from Power BI Desktop installed on a Windows VM.
Launch Power BI Desktop on a Windows VM as an administrator.
![]() or
or
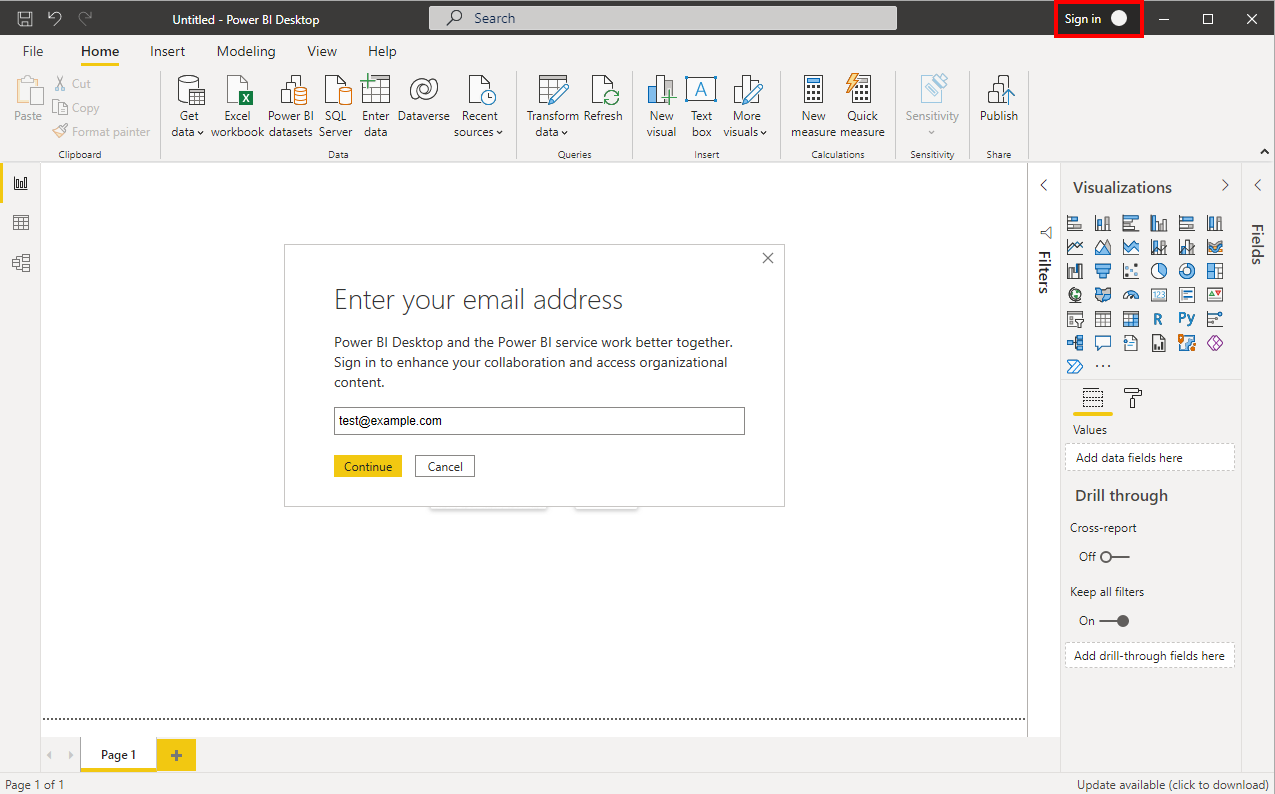
Press [SIGN IN] and sign in using the Power BI account assigned.
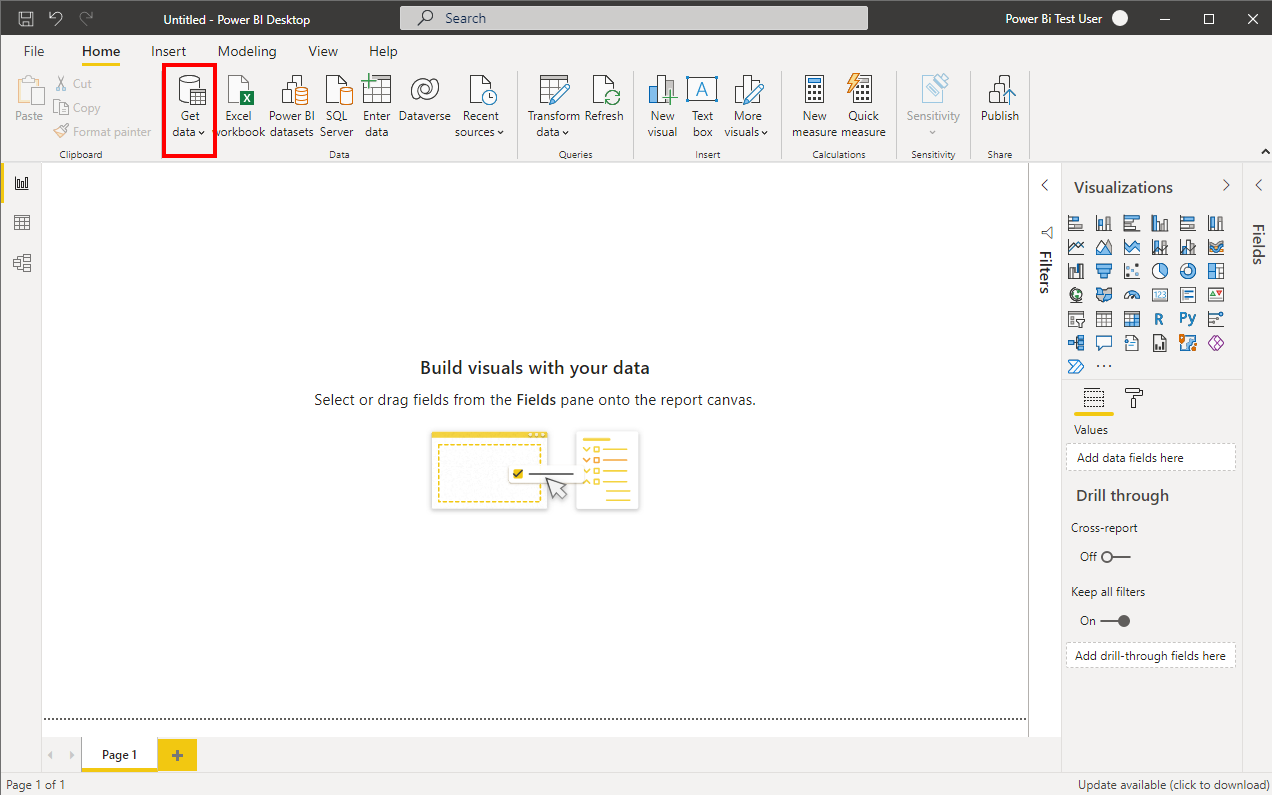
After sign-in, press [Get data].
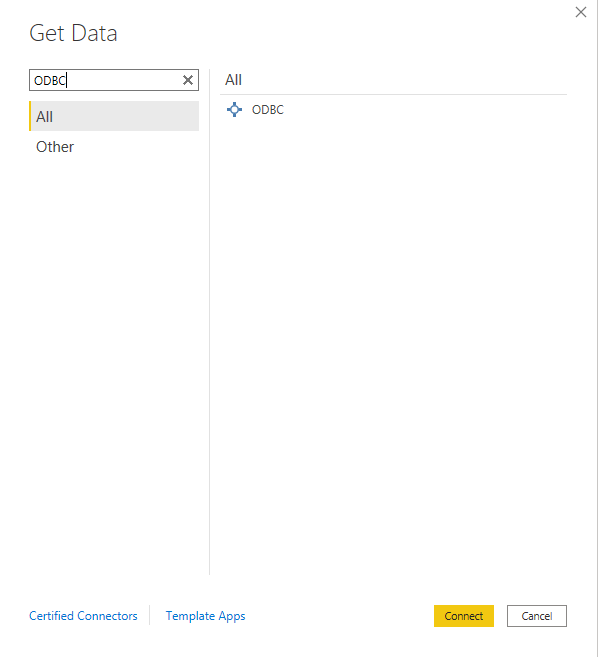
Select [More...].

Having selected [ODBC], press [Connect].
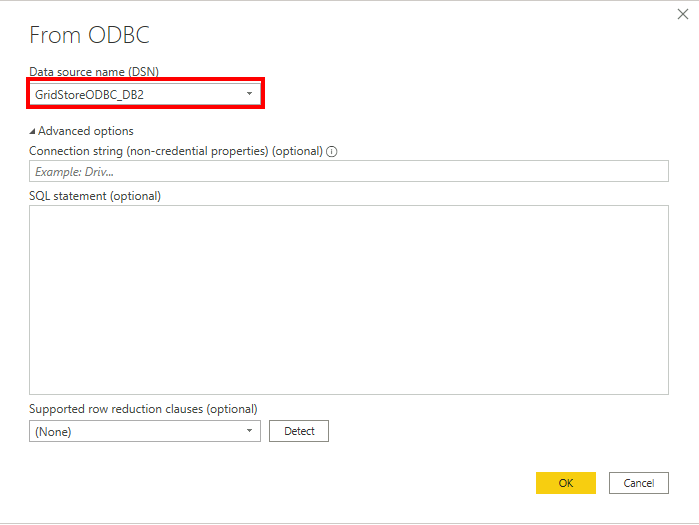
In the [From ODBC] screen that appears, select the DSN for the GridDB ODBC driver previously set up on a Windows VM. Once it is selected, press [OK].
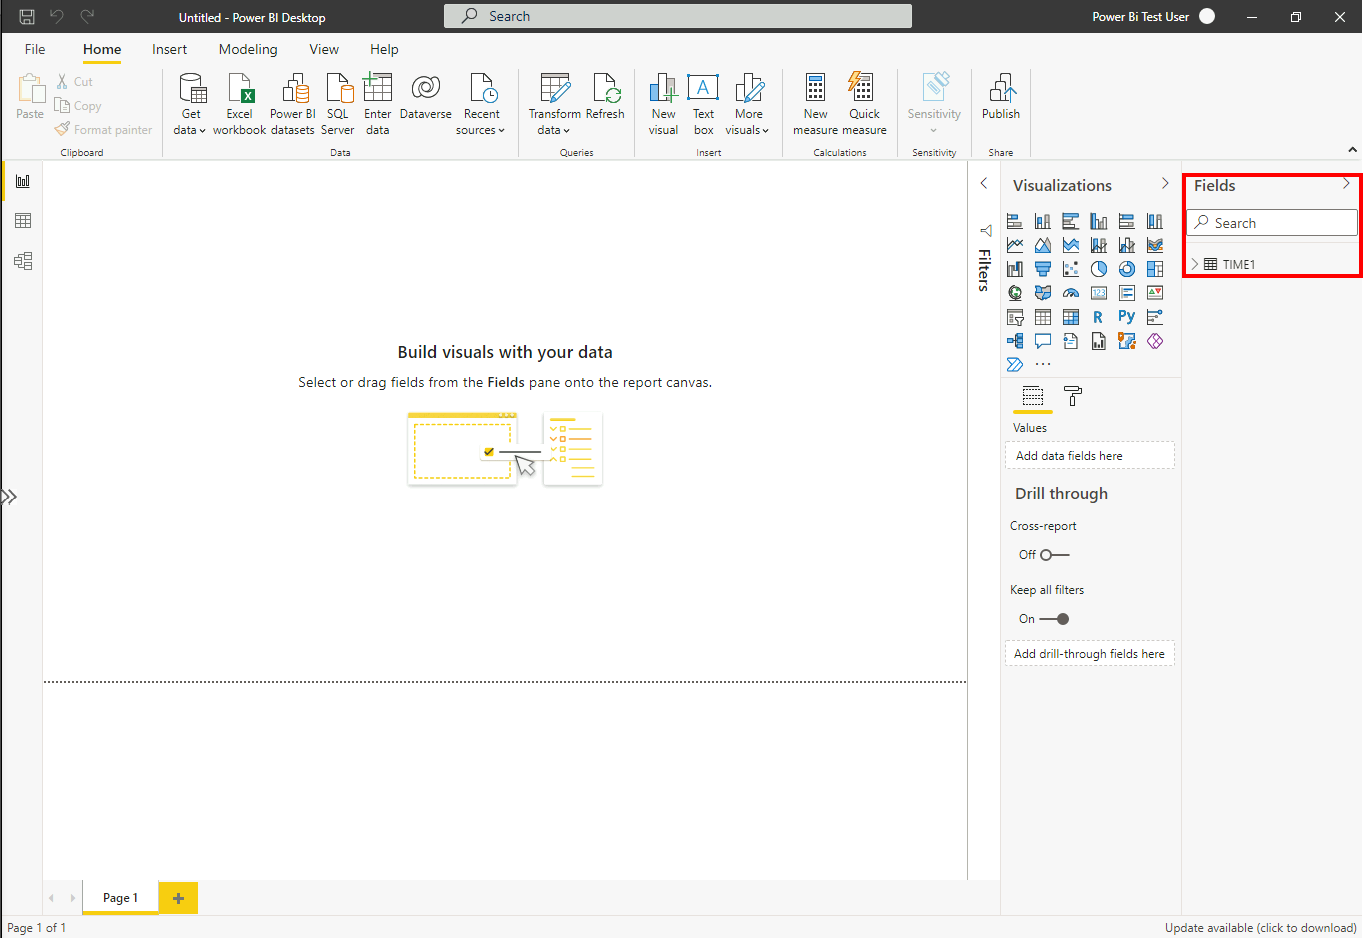
Check that the data retrieved via ODBC is imported into Power BI Desktop and applied to the Fields pane.
5.3.5 Working with Power BI Desktop/Power BI Service
Publish a data set and work with Power BI Desktop and the Power BI Service.
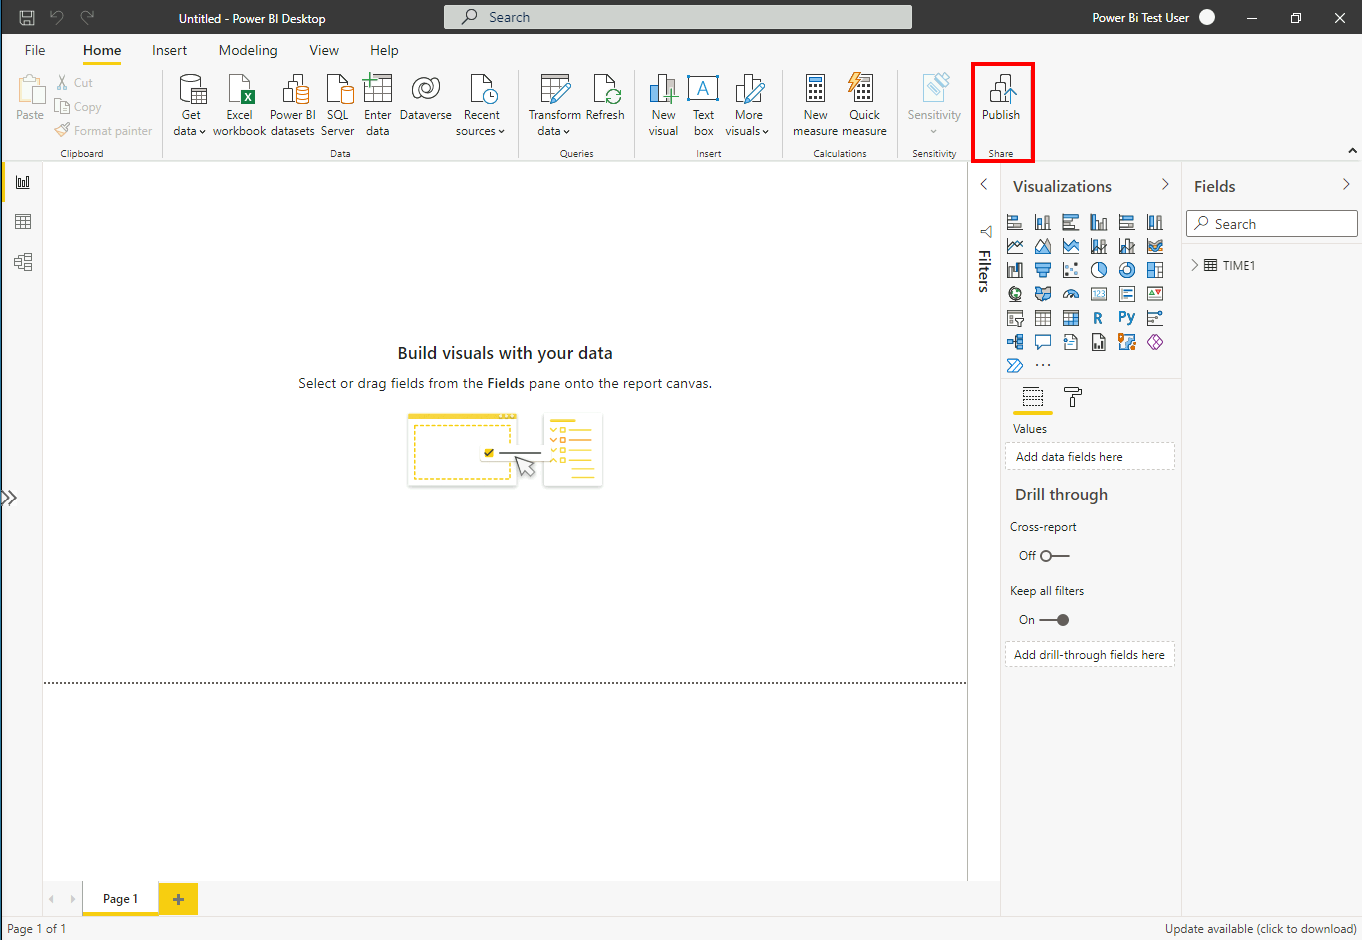
Select [Publish] on the ribbon in Power BI Desktop on a Windows VM.
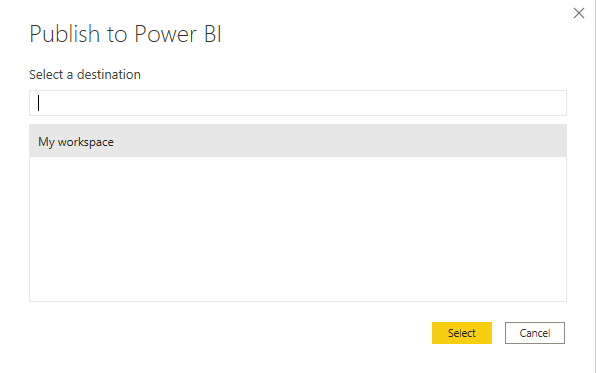
Select the data set to be published to the Power BI Service and publish it by pressing [Select].
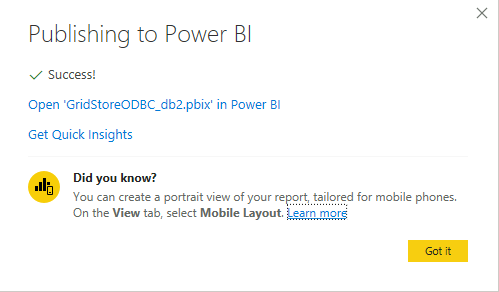
Check that publishing is complete.
Start a Web browser on the operation terminal and sign in to the Power BI Service.
Select [Datasets] in the menu on the bottom left of the window and check that the published data (dataset) is displayed in the window.
5.3.6 Configuring to work with the on-premises data gateway
Work with the data set uploaded to the Power BI Service and the on-premises data gateway.
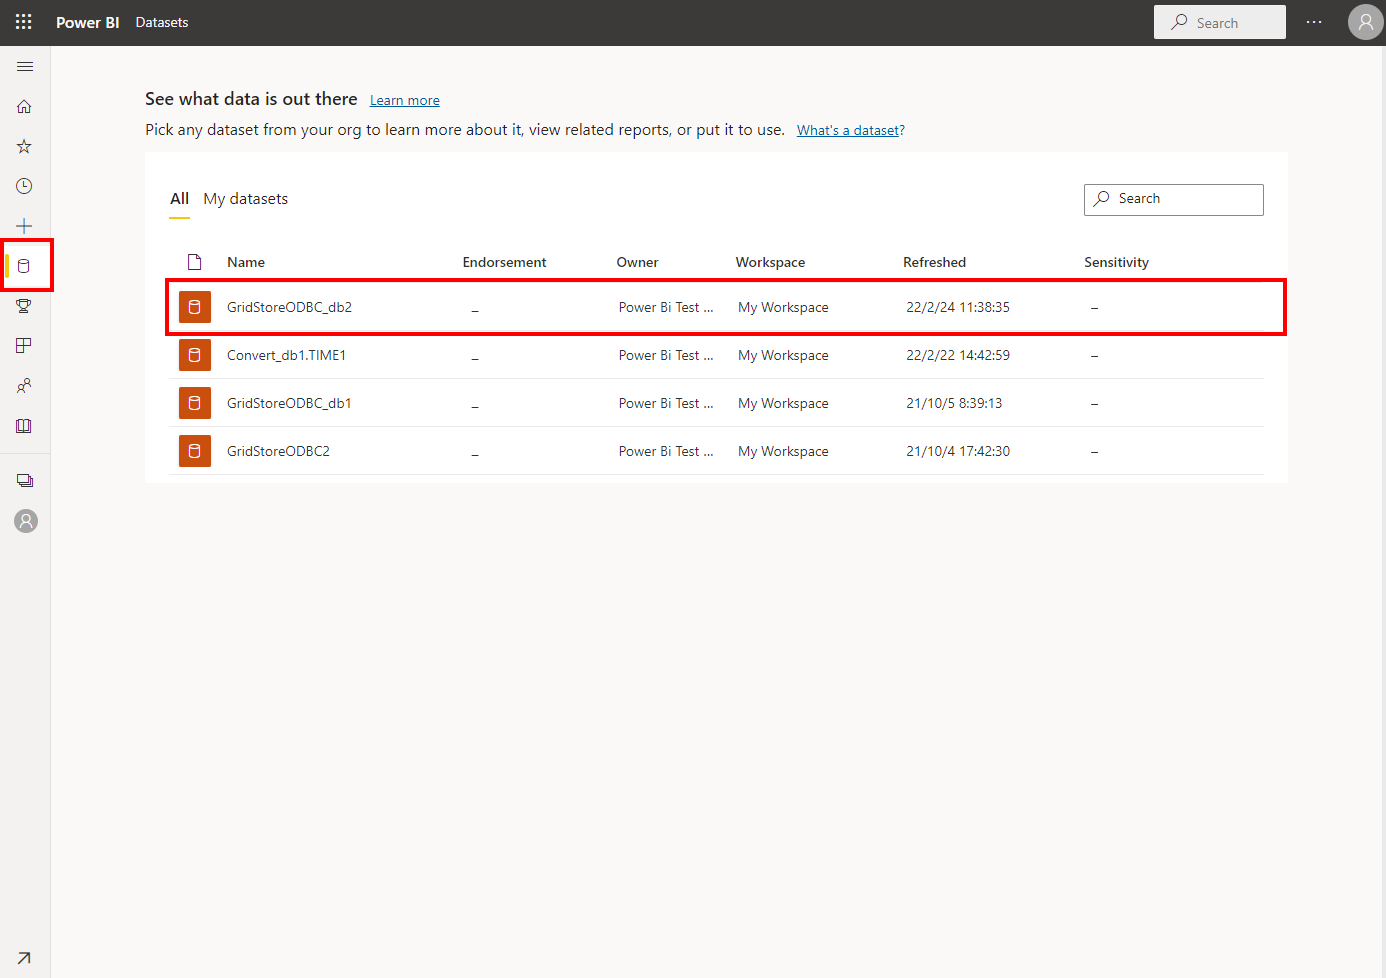
Select [Datasets] from the menu on the bottom left of the window and check that the uploaded dataset is displayed in the window.
Select the three vertical dots (...) next to a dataset, and then select [Settings].
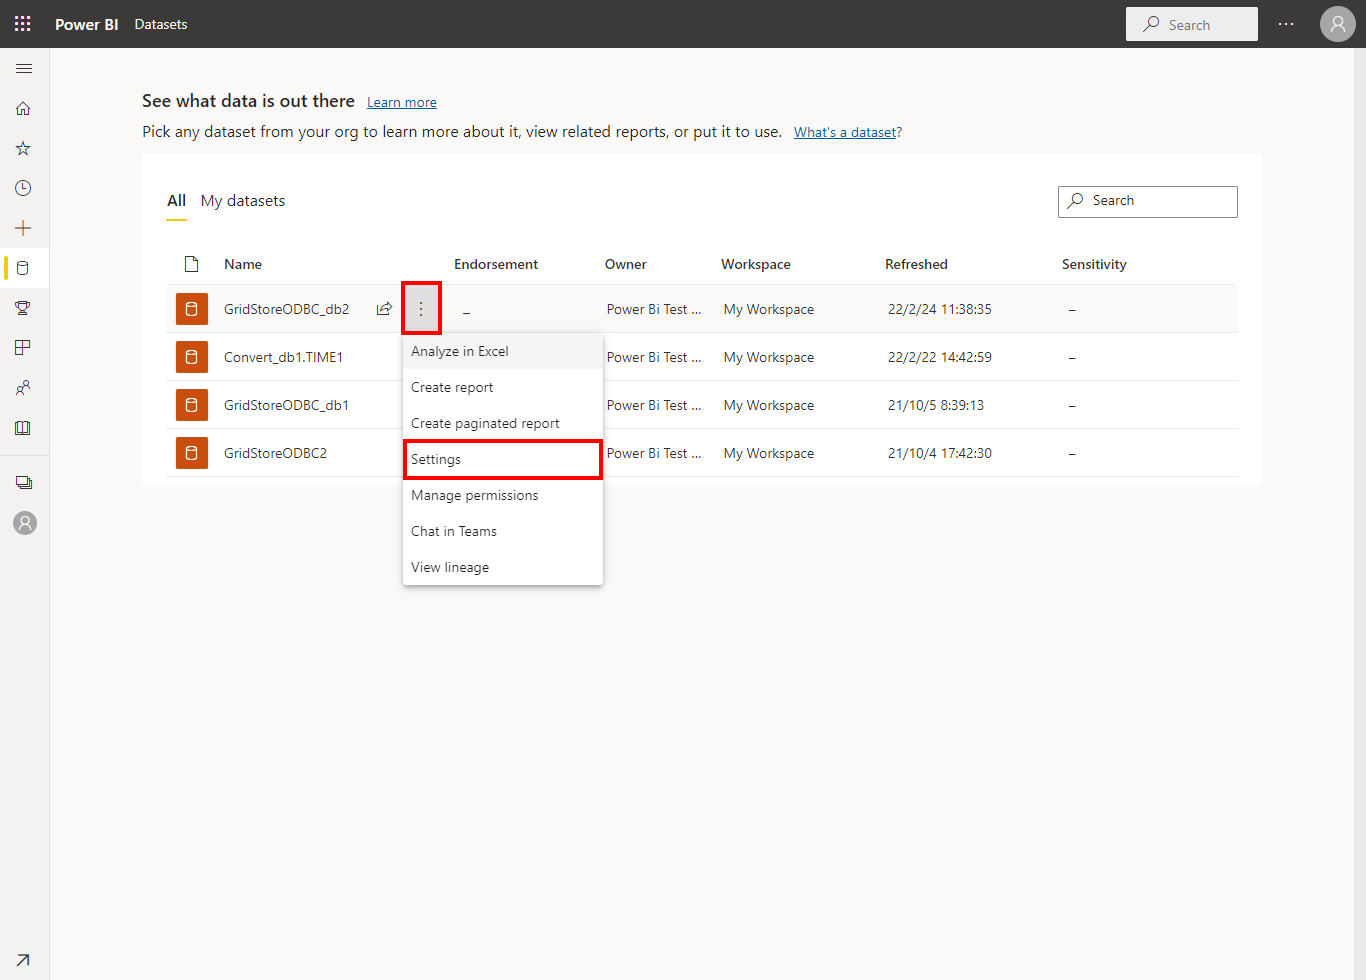
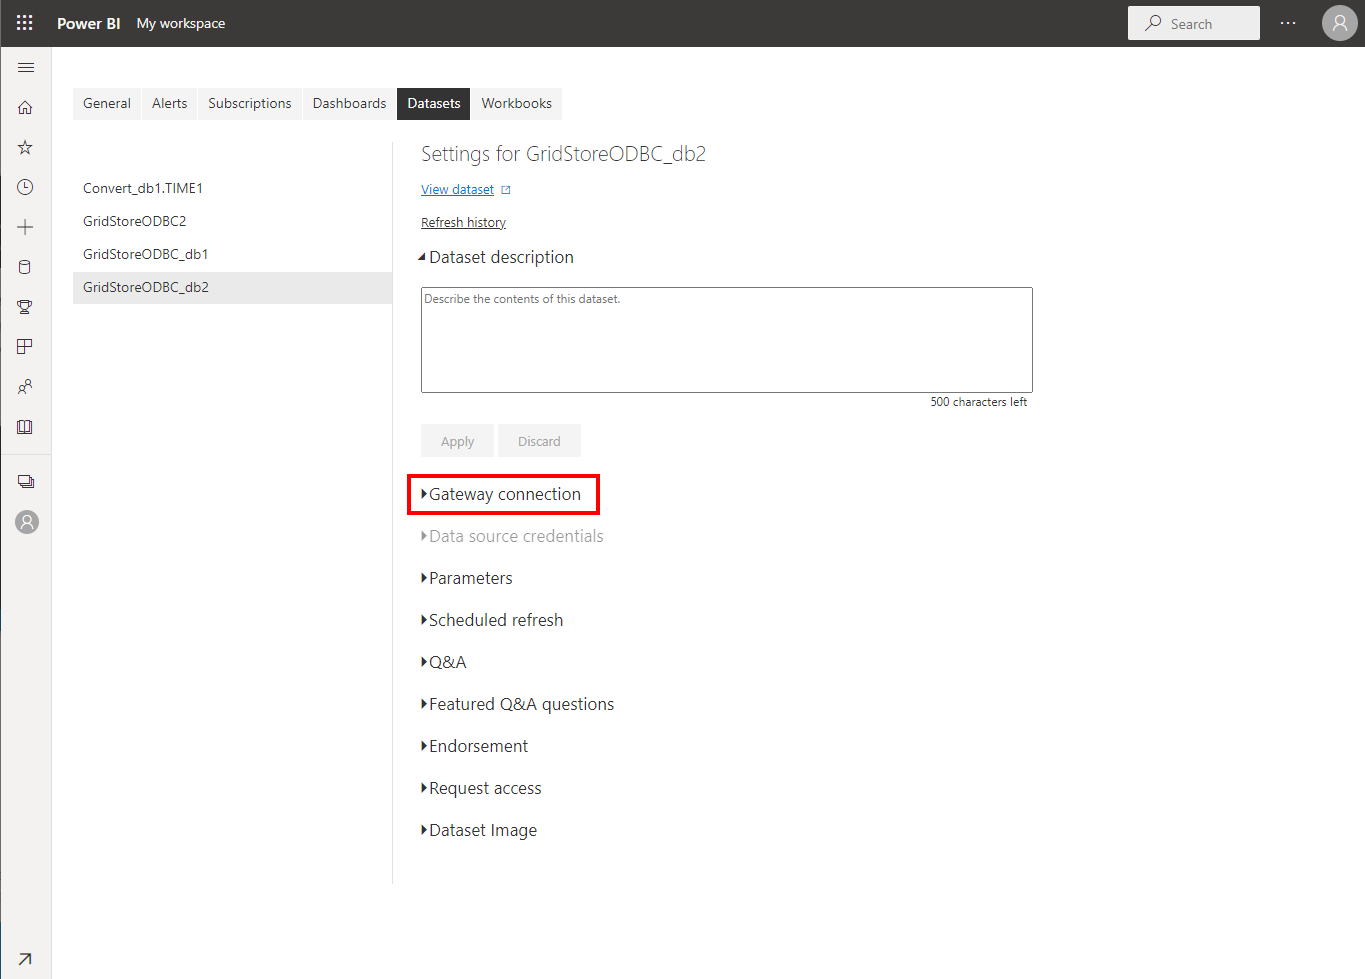
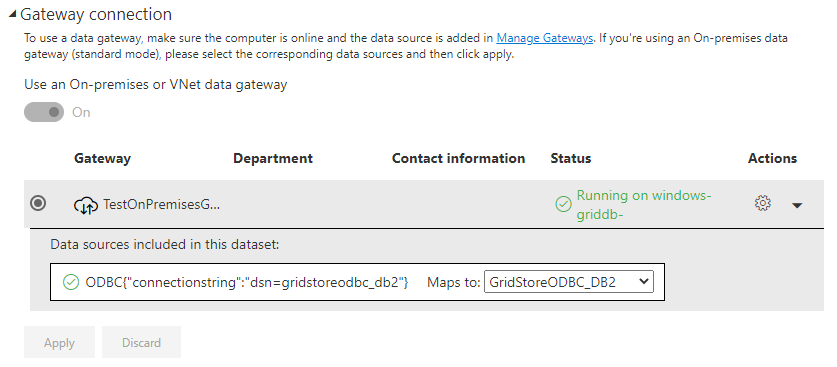
Select [Gateway connection] to open a window for setting connection to the on-premises data gateway.
Choose the data source that has been set in the previous section [Working with the Power BI Service] from the pull-down menu under [Maps to] and press [Apply].
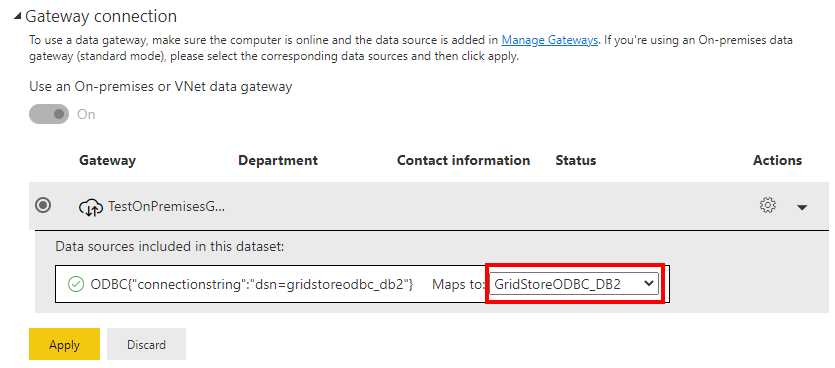
Check that connection to the on-premises data gateway is established.
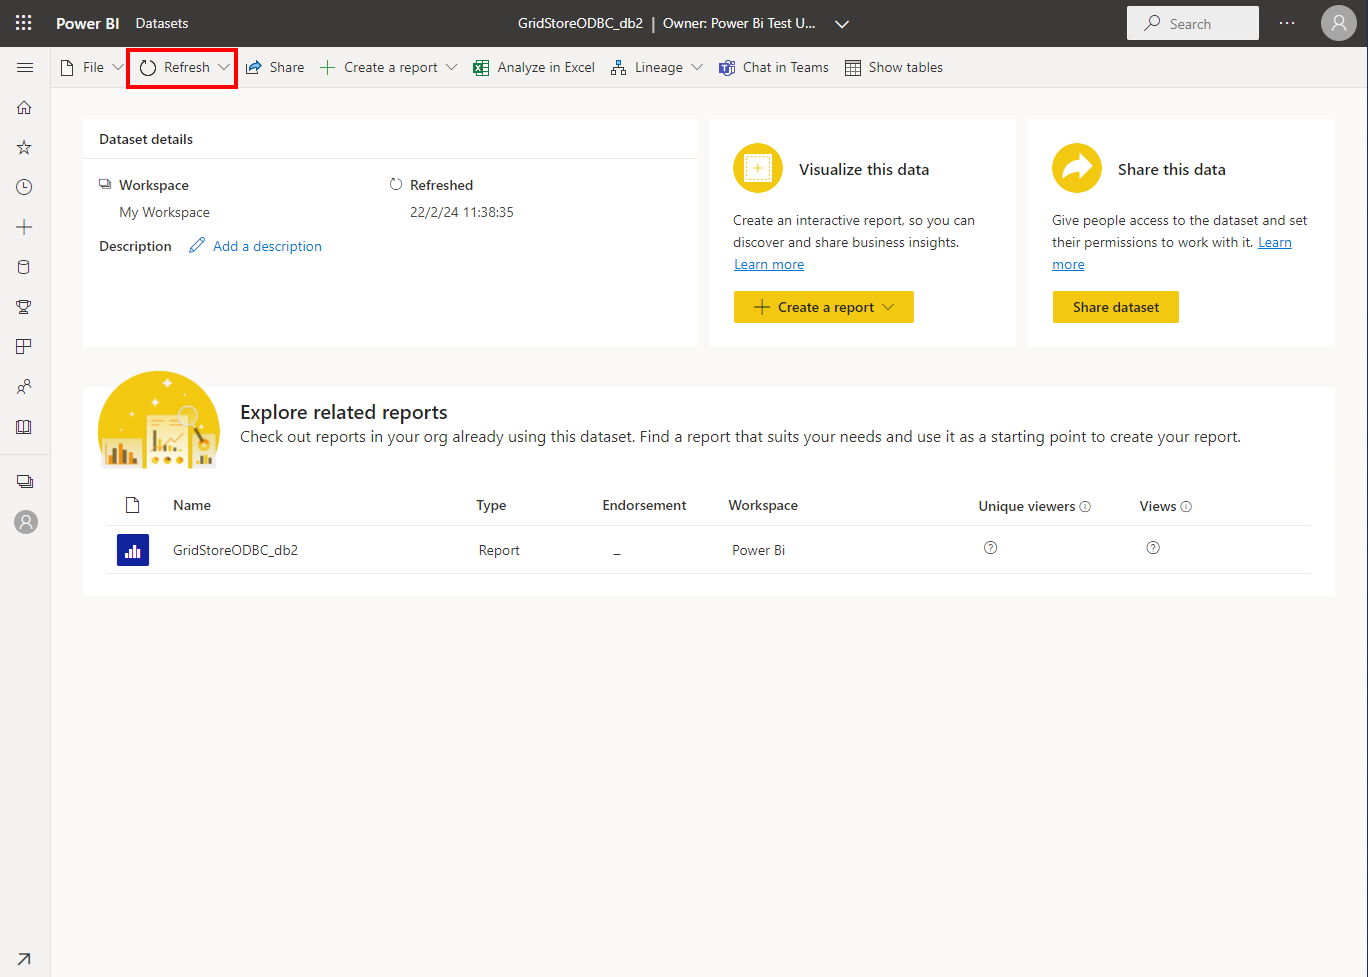
From the top menu, select [Datasets] and then select the uploaded dataset.
Press [Refresh] and check that the data is refreshed.